Page Contents
What Is A Table Saw?
I’m writing this post to give beginner woodworkers a solid understanding of the table saw.
Did you know there are 6 different types of table saws?
We will also drill into the standard table saw parts and terms, and consider accessories available for the table saw. Of course, we need to address:
- what a table saw is used for
- best practices and safety
- table saw/circular saw history
What is a table saw?
In its most basic form, a table saw is a stable flat surface or “Table” that as an electric motor powered circular saw blade mounted to the underside of the table.
The circular saw blade extends through the middle of the table. The saw blade is centered, and the blade height can be adjusted from 0 inches to almost six inches above the tabletop surface, depending on the size of the saw blade.
An Electric motor is mounted under the table, so the top table surface is clear except for the cutting blade.
The Table saw is a convenient work station. It is designed explicitly for sliding wood stock into the cutting teeth of the saw blade, making clean, efficient, and consistent cuts.
NOTE: The table saw only cuts in a straight line.
When making multiple repetitive cuts, a table saw will almost always make better and more consistent cuts in wood than a handheld Circular saw.
Safety Concerns
Genuine safety concerns exist when using any power tool, and that remains true for the table saw.
The two main concerns are
- Cutting yourself on the saw blade.
- Kickback. Kickback happens when a wood board is fed into the saw blade. Then, for one of several possible reasons, the teeth on the backside of the saw blade catch on the workpiece and throw it into the saw operator at a very high speed.
What are the Parts of a Table Saw?
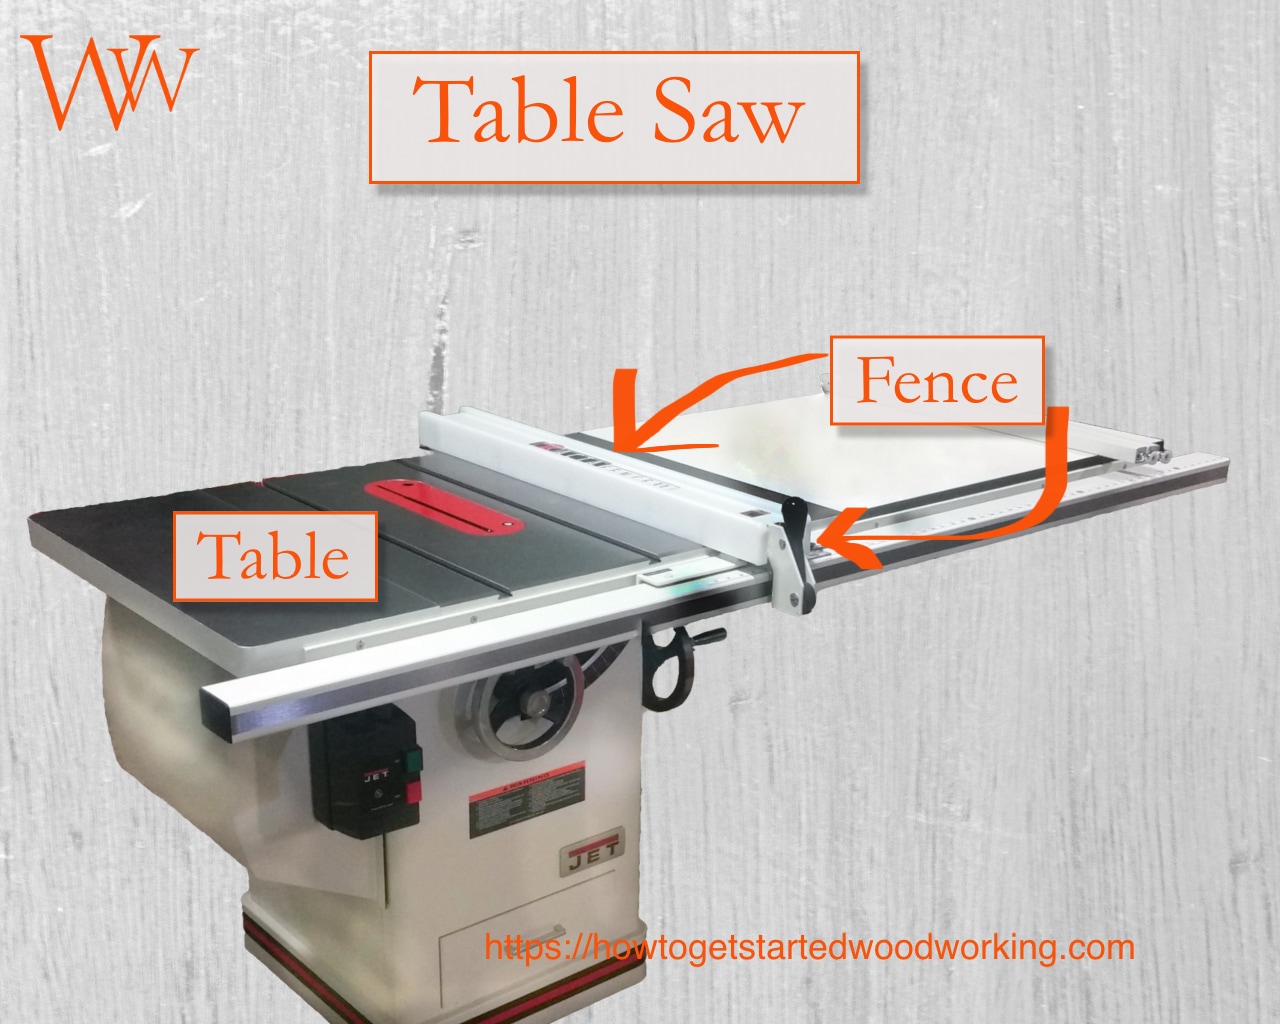
Table
The large flat surface that gives the tool its name. This table is usually made from cast iron, cast aluminum, or steel. The size and material of the table will vary depending on the type of table saw. Higher quality saws will have cast iron table surfaces.
The table has two grooves or slots that run parallel to the saw blade, one slot on each side of the blade. These slots serve as guides for accessories like a “Mitre Gauge” that makes cutting wood at different angles simple. There are other accessories I will identify below.
Fence
Rip Fence and Miter Fence.
- Rip Fence:
A metal bar that rests on top of the table and runs parallel to the cutting blade. The rip fence attaches to the saw table with a locking handle mechanism that grips the fence rail that is mounted to the front edge of the saw table. The fence rail is marked with graduated measurements to accurately adjust the fence for cutting. The rip fence is named for its purpose, cutting lengths of wood along the grain.
The size of your table and the distance from the blade to the rip fence determine the size of the wood stock you can cut on your table saw. Accessories in the form of add on in-feed and out-feed tables can significantly expand a table saws capacity.
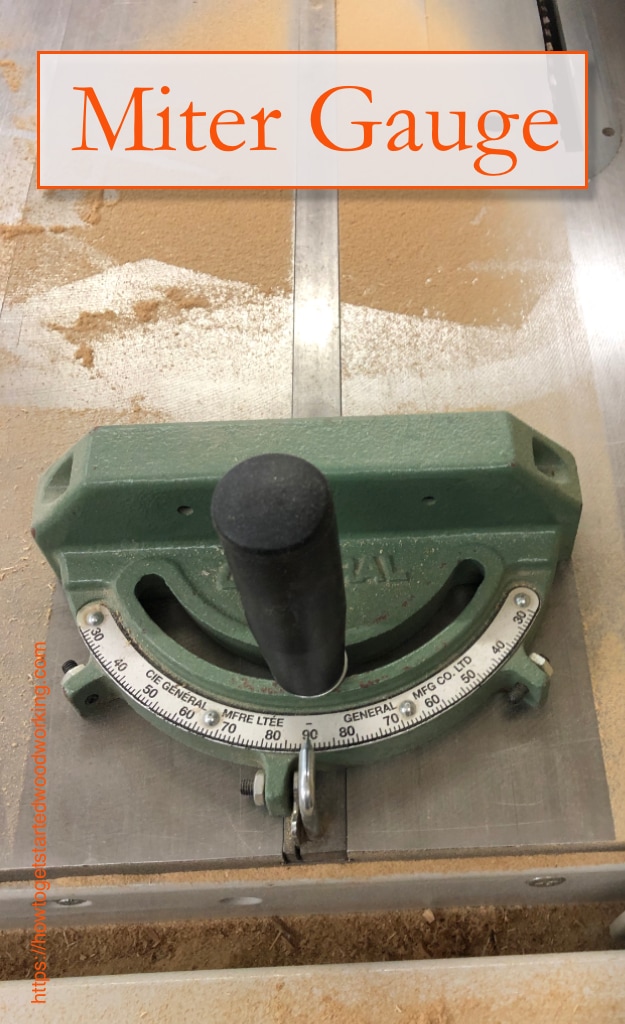
- Mitre Fence:
Also called a Mitre Gauge or Mitre Head, depending on the specific design. This fence mounts in the table slot (usually to the left of the blade) and can be adjusted from 0° for perpendicular to the saw blade to 45° or more depending on the manufacturer. The miter fence is used for making angled cuts for a multitude of different applications.
Table saw fences enable you to make straight and controlled cuts. Without a proper fence, a table saw is almost useless.
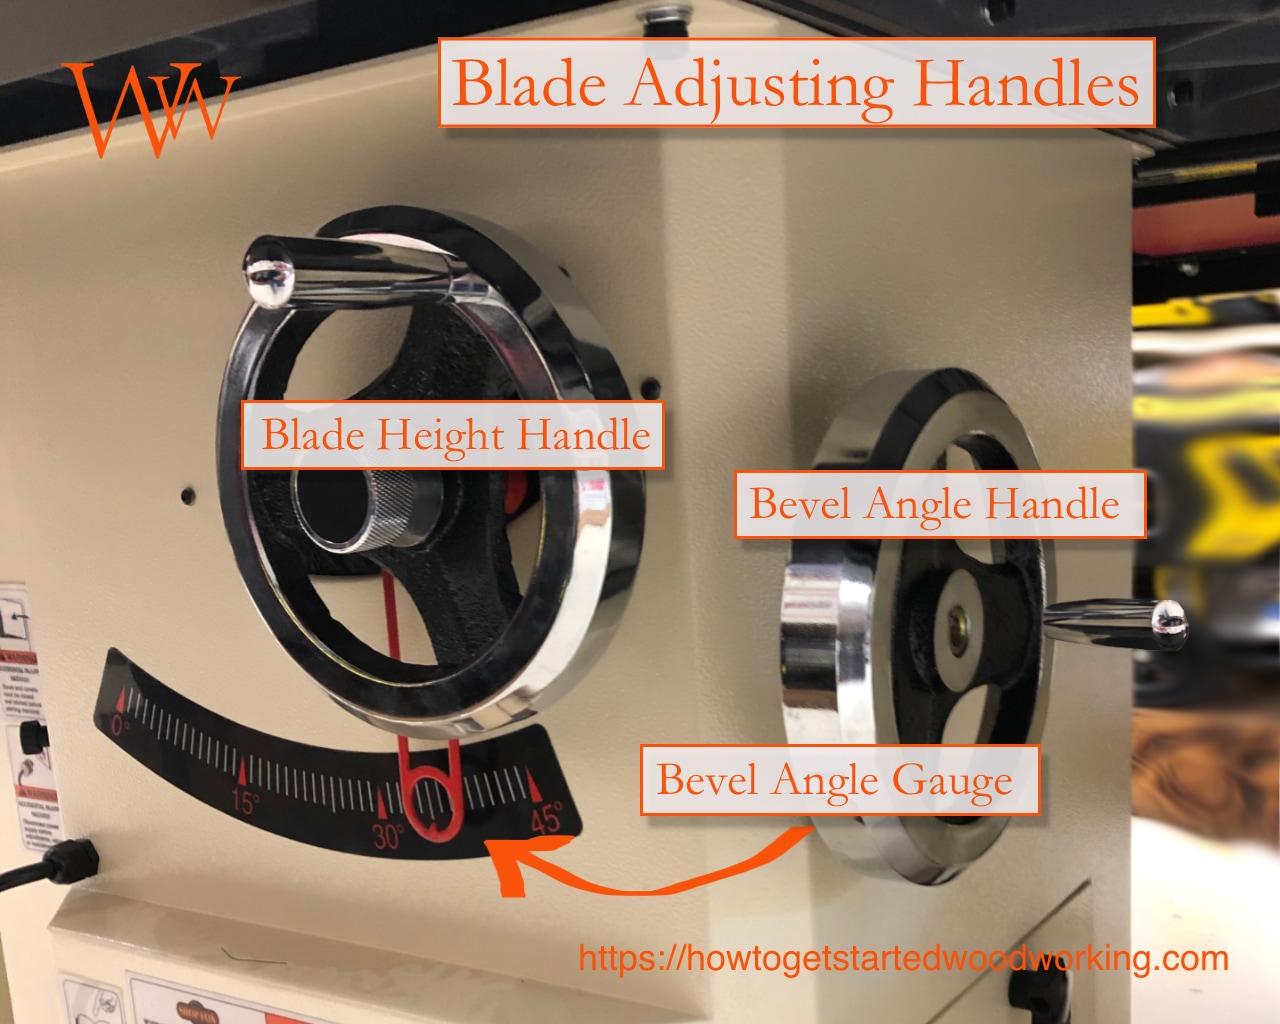
Bevel Scale
On the front of the table saw, the bevel scale, also referred to as a bevel gauge, is usually next to the blade height adjustment and Power switch. The bevel angle handle (located on the right side of the saw) allows you to adjust the angle of the saw blade to cut from 0°(vertical) to 45°.
Blade Adjusting Handle
This looks like a small steering wheel with a crank handle on it. Usually located on the front of the table saw near the bevel scale. It is used for changing the height of the saw blade.
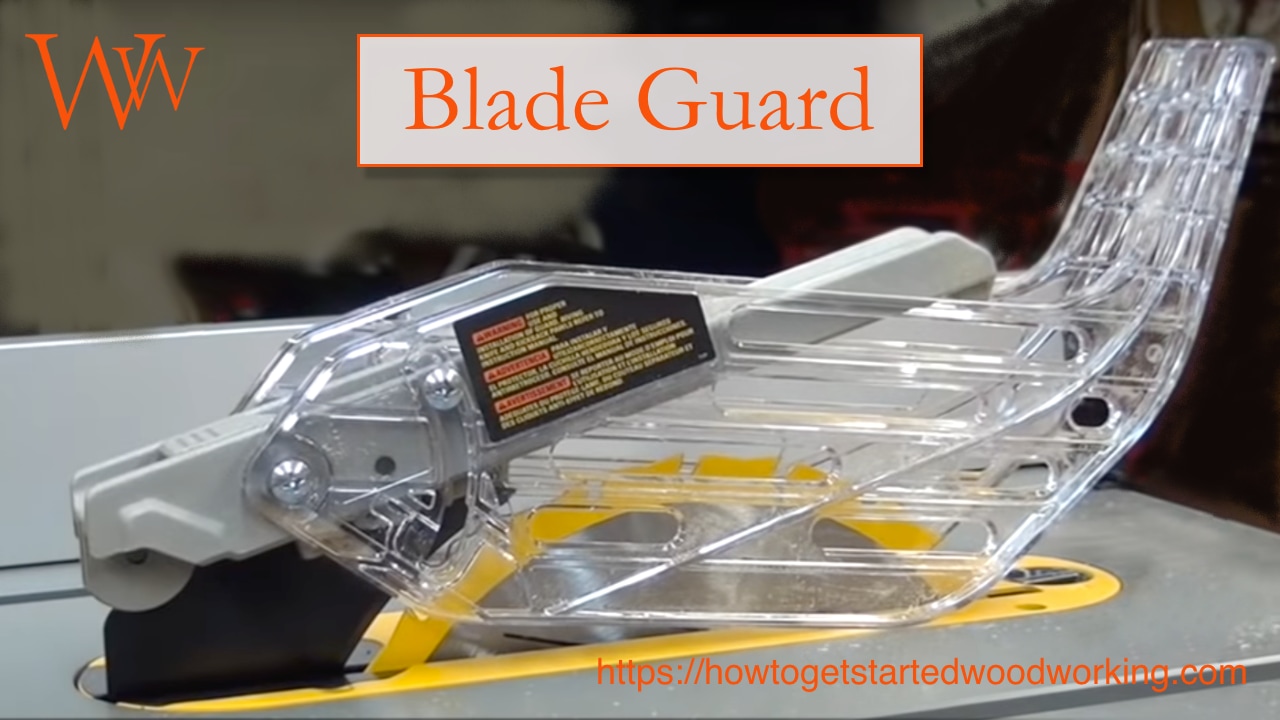
Blade Guard
The blade guard is attached behind the saw blade. It is usually a hinged apparatus that slides up and over any material being fed through the saw for cutting. Blade guards are generally made of clear plastic or acrylic that protects the user from dust and debris while sawing.
Riving Knife
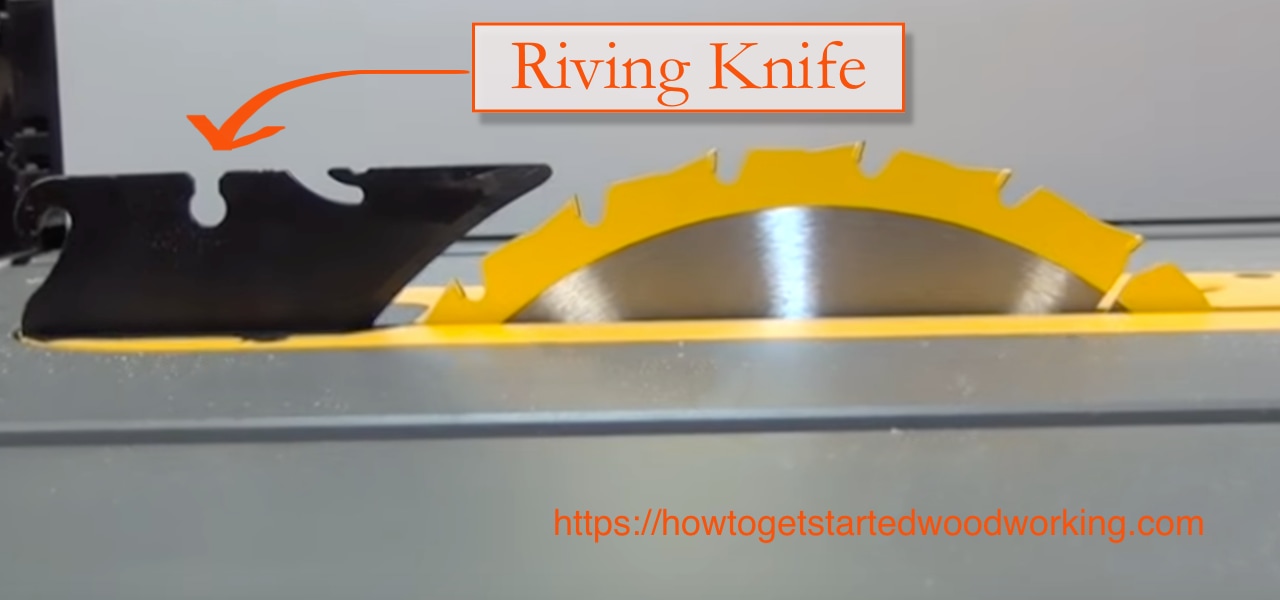
One of the greatest dangers, when operating a table saw, is the possibility of kickback. A riving knife helps prevent this from happening by preventing cut wood from touching the rear teeth of the saw blade, the most common cause of a kickback. The Best riving knife is attached to the arbor assembly and will raise and lower with the saw blade height adjustment.
Splitter
Similar to a riving knife. The splitter is attached behind the saw blade. A Splitter prevents the kerf of a circular saw blade from closing and causing kickback.

Anti-kickback Pawls
Often part of the blade guard and riving knife assembly, anti-kickback pawls are designed to work as a one-way “gate” for the wood to pass under. In the event a kickback occurs, teeth in the anti-kickback pawls grip the wood and prevent it from flying backward into the user.
Blade Plate or Throat Plate
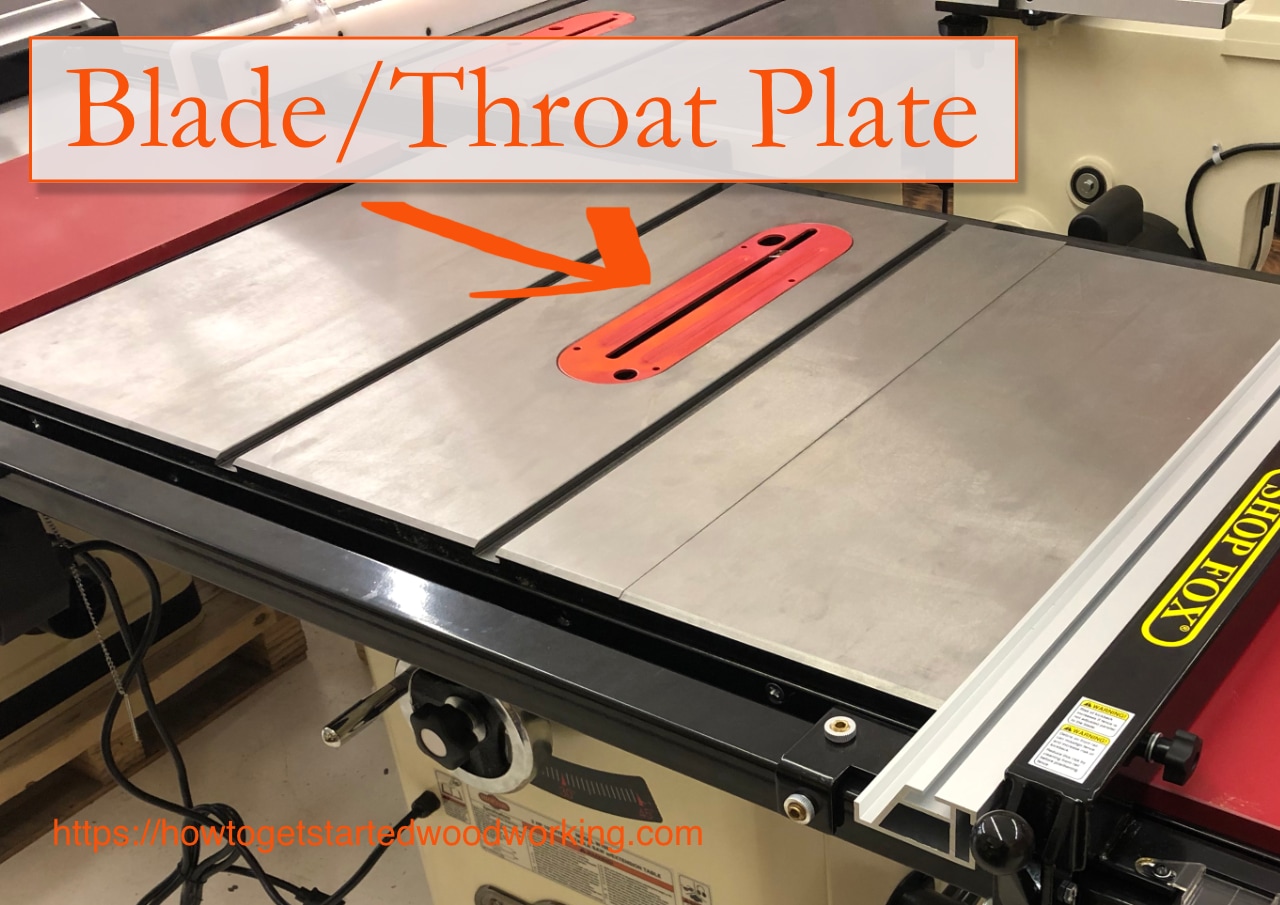
A blade plate is an oblong or rectangular plate with a slot for the saw blade to pass through. It is installed in the tabletop to gain easy access to the saw blade. This plate is removed when changing saw blades or doing maintenance tasks.
A different blade plate can be installed that has a wide slot to accommodate dado blades (which can cut wide grooves or “rabbets”).
Saw Blade
There is a large variety of different saw blades for various applications. Still, a basic description is a steel disc, with Sharp teeth cut around its circumference. Most modern saw blades will have tungsten carbide tips welded or more accurately brazed-on each tooth. As the blade rotates, each tooth works as a small knife or chisel, rapidly cutting the material that is fed into it.
The saw blade consists of a steel plate, an arbor hole, shoulders, and gullet for the teeth. These carbide tips are cut at various bevel angles for different purposes. Many modern blades have a special coating to prevent friction and extend the service life of the blade.
For a more comprehensive look at saw blades, please see my post About Circular Saw Blades.
Electric Motor
An electric motor drives the saw blade in the table saw.
Table saw Motors vary in power from 1.5 horsepower (hp) found most commonly in the benchtop or contractor table saws using brushed universal motors.
Induction motors up to 5 hp are most widely used in premium cabinet table saws and better hybrid and contractor table saws.
-
Induction motor:
A large heavy motor that is suited to stationary shop tools like the cabinet table saw. It is not used in portable hand tools.
-
- Pros:
- very quiet
- energy efficient (fewer amps per horsepower)
- better for continuous running
- much, much, much, longer service life
- Pros:
-
- Cons:
- slower startup speed (like starting out in high gear)
- lower maximum RPM than universal motors
- Cons:
NEMA, the National Electrical Manufacturers Association, in coordination with the IRSC, International and Regional Standardization Committee, has worked in the electronics manufacturing industry to standardize induction motors.
This means the size and components within an induction motor are the same from different manufacturers, so its simple to find replacement parts and motors.
-
Universal motor:
Ironically, “Universal” motors do not have a standardized manufacturing system, so replacing these motors is difficult to impossible in some cases.
-
- Pros:
- Smaller and lighter
- Used in virtually every portable electric power tool
- Higher torque, and faster startup speed
- Better for frequent starts and stops
- More variable speed and higher RPM than induction motors
- Pros:
-
- Cons:
- very noisy
- less efficient with a higher amp to horsepower ratio
- shorter service life than induction motors
- Cons:
Trunnions
A definition from the Merriam-Webster dictionary, the trunnion is “a pin or pivot on which something can be rotated or tilted.”
Trunnions are a vital part of the table saw motor assembly and are found attached in either of two locations.
- They are attached to the underside of the saw table on Benchtop, Jobsite, some Contractor, and some Hybrid table saws.
- Trunnions may also be attached to the supporting table saw cabinet on Cabinet saws, some Contractors, and some Hybrid table saws.
NOTE: Trunnions attached to a saw cabinet are superior in quality. They are much easier to maintain and adjust than those attached to the underside of the saw table.
Arbor
On direct drive table saw’s, an arbor extends directly from the motor and is like an axle that the saw blade is attached to.
Arbor Assembly
Belt drive table saws have an Arbor assembly that is like an axle. On one end, the table saw blade is attached, on the other end are 2 to 3 pulleys. V-shaped belts are used to connect the pulleys from the motor to the arbor assembly pulleys. Another part of the Arbor assembly is a gear mechanism for raising and lowering the saw blade and adjusting the bevel angle.
Arbor, Trunnion, and Motor Adjustment Assembly
When this component is installed on a table saw, it provides the ability to raise, lower, and change the bevel angle of the saw blade from 0° to 45°.
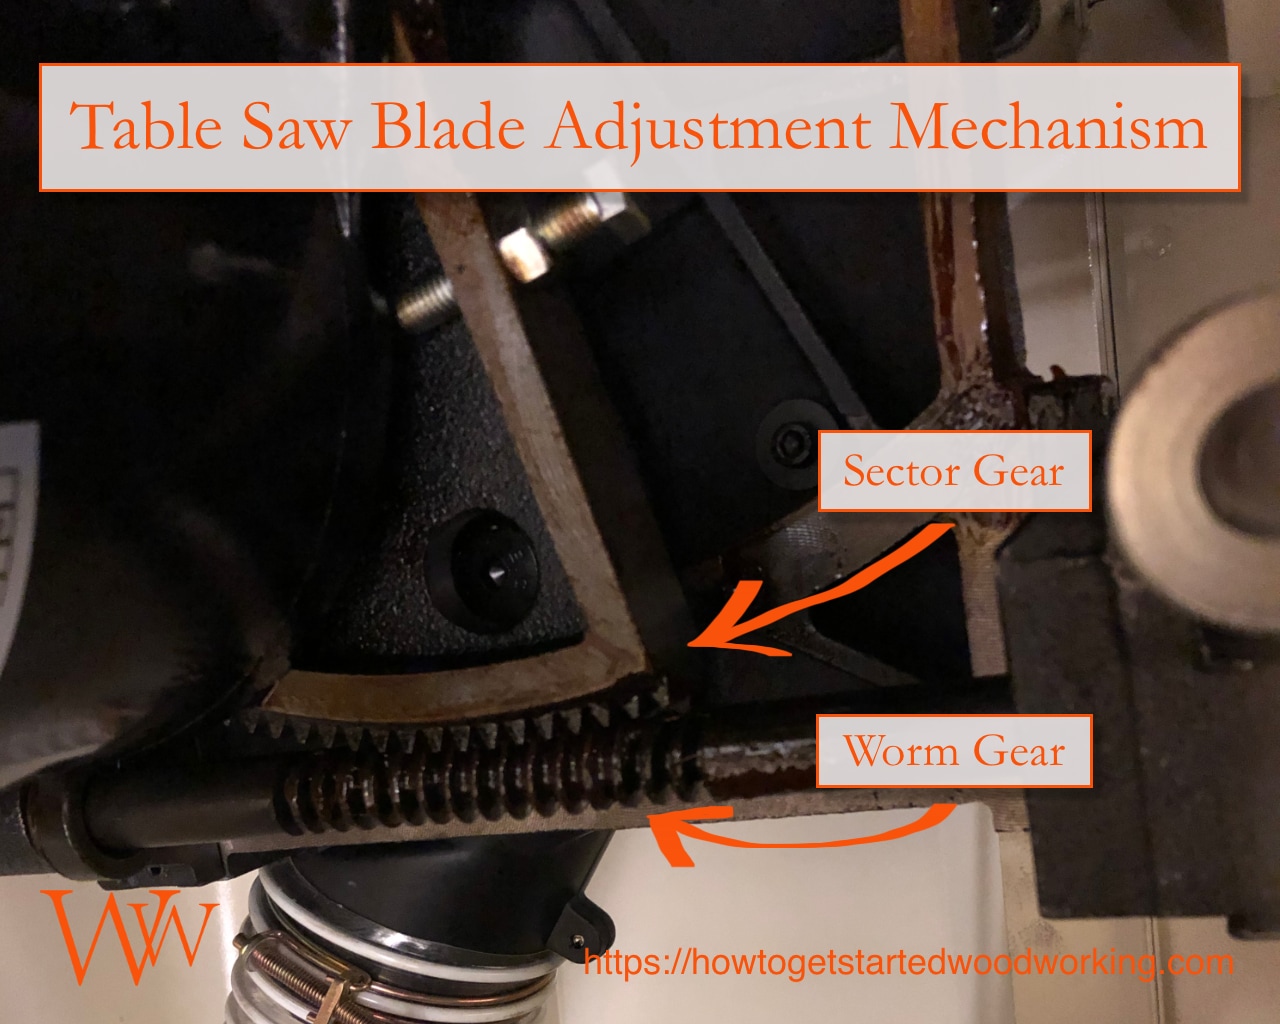
The mechanisms that alter the angles include the combination of a sector gear and a worm gear that is attached to the blade adjusting handle and another attached to the bevel adjusting handle.
-
Sector Gear:
A sector gear is a portion of a gear. Not a full circle, it only has teeth on a short section of its circumference. The rest of the gear is smooth without any teeth. Sector gears are used in applications when less than 360 degrees of rotations are required.
-
Worm Gear:
"A worm gear is a device consisting of a threaded shaft that mates with a gearwheel, so that rotary motion can be transferred between two shafts at right angles to each other.”
Worm gears are used to transmit motion or power between right-angled shafts when a high-ratio reduction is necessary.
Bevel Adjustment Assembly
The adjustment assembly uses worm and sector gears to move the saw blade from vertical 90° to 45°.
Anytime you cut wood on a table saw that is at an angle other than 90°, it is a Bevel cut.
Power Switch
Each table saw is equipped with a switch to turn it on and off. Depending on the type and quality of the table saw, the switch could be a simple toggle switch or a hands-free power safety switch.
Direct Drive Table Saw
Direct drive means the saw blade is attached directly onto the Arbor that comes out of the electric motor.
The motor rotates at the exact same speed as the saw blade. Direct drive is the most common system on smaller and lower cost table saws.
Belt Drive Table Saw
A belt drive table saw means the saw blade is attached to an arbor that is connected to a pulley. The pulley is connected to another pulley on the electric motor using a belt. (A lot like a fan belt in your car.)
The belt drive system is most common on high-end table saws. These systems take up slightly more space but offer more power, longer service life, and are quieter.
Types of Table Saws
Benchtop Table Saw
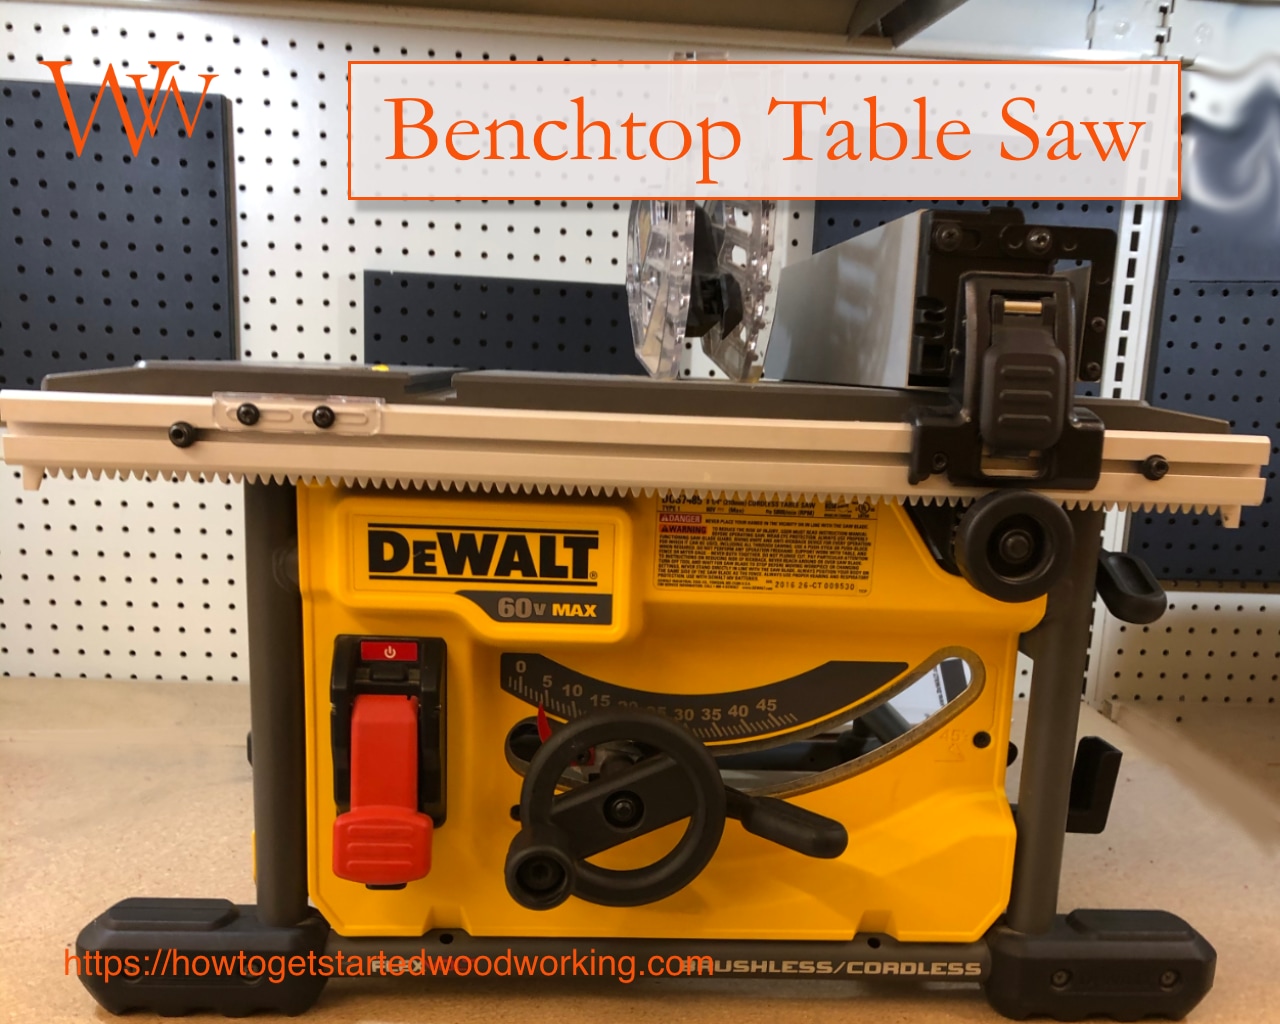
The benchtop table saw, as its name implies, is a small and portable table saw designed to rest on a workbench.
There are no supporting legs included, but at about 50 lbs it is easy to move and store.
Most benchtop table saws will have a standard 10 inch saw blade, a one and a half to 2 hp motor, bevel and blade height adjustment and blade guard.
These saws suffer the most in the quality of the table surface and the accuracy of the rip fence. To produce a table saw that is easily portable, choosing materials other than cast-iron becomes essential.
Benchtop saws will have aluminum or sheet steel components in the tabletops. Their fence and rail systems tend to be less accurate, and a bit on the flimsy side though many manufacturers are working to improve this feature.
For use in small shop environments, where space is at a minimum, and the ability to store tools is necessary, a benchtop table saw might be just what you need.
However, if cutting plywood or other large sheet materials is essential, keep reading to discover the best table saw for you.
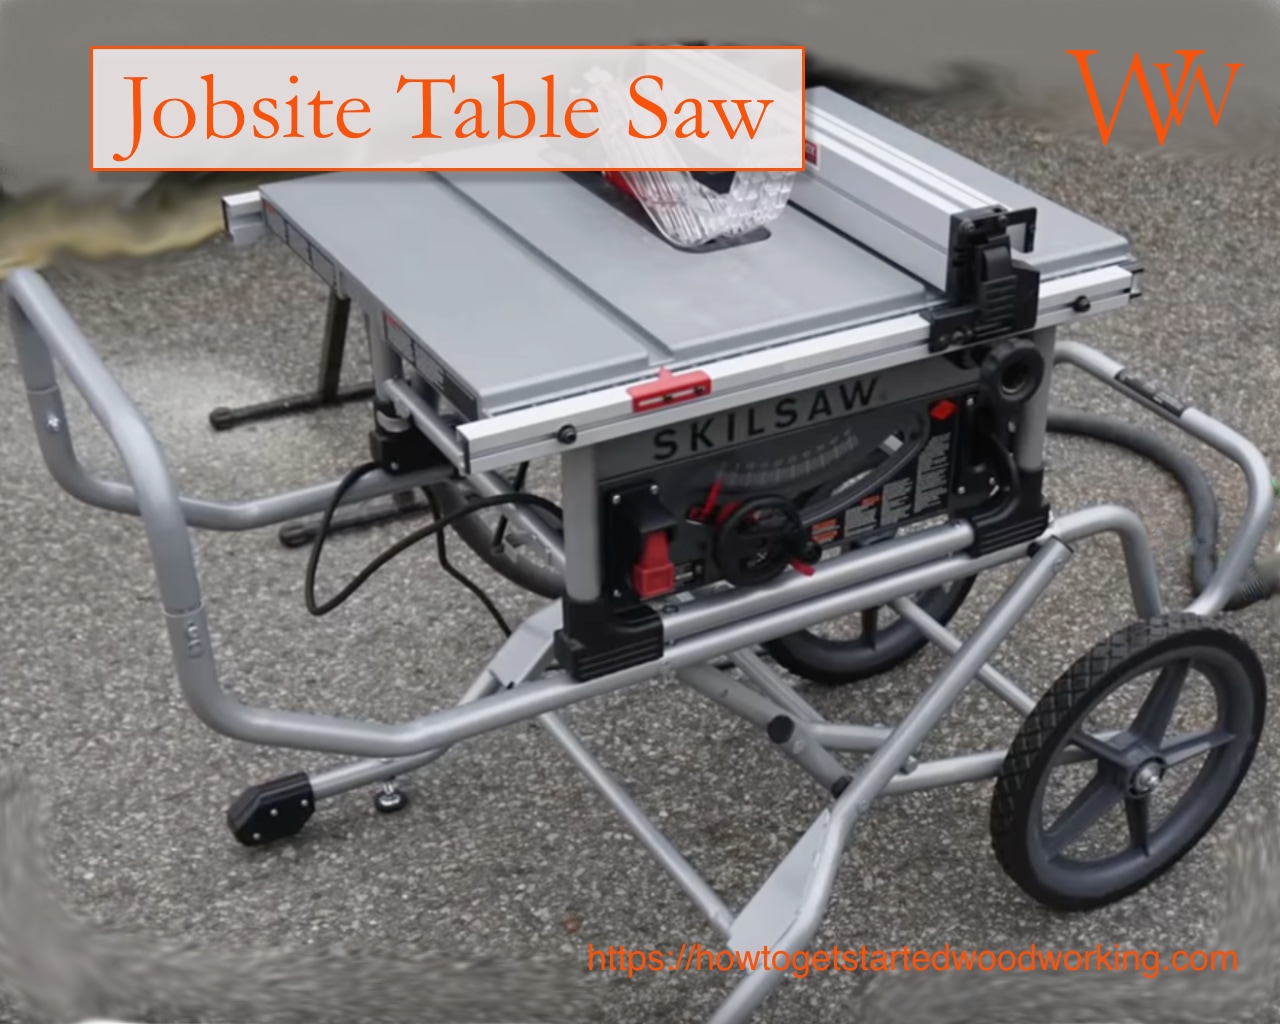
Jobsite table saw
Jobsite table saws are designed specifically for rugged use and portability to a job site as the name intends.
These table saws weigh about 100 lbs and feature a built-in cart and folding legs that allow it to be moved quickly and set up almost anywhere.
A Jobsite table saw is practically identical in design to the Benchtop table saw except for the wheels and folding stand.
These saws are designed for use by construction crews and are very useful for cutting large volumes of stock. You should note that most of the work done by construction crews do not require the precision cutting required for making cabinetry or furniture.
A Jobsite table saw may require a lot of additional adjustments to make precise cuts. If precision cutting is a consistent requirement for your projects, you will likely want to consider a higher quality tool.
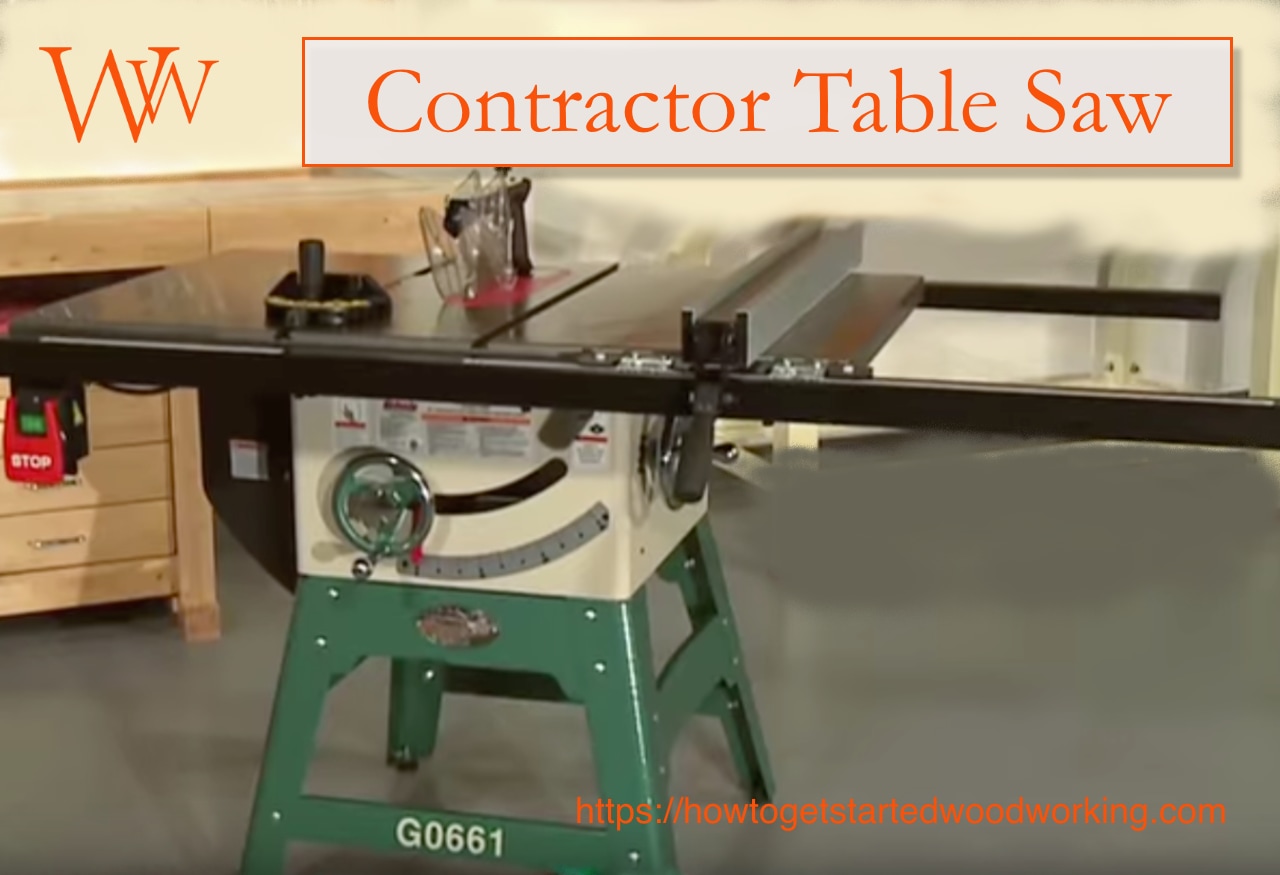
Contractor table saw
The name of this saw is confusing and misleading to many people, even many would-be experts.
Contractor saws are frequently included in comparisons with Jobsite table saws, with their names being used interchangeably. This is an error as there are pronounced distinctions between the Contractor table saw and Jobsite table saw.
Contractor table saws now represent a big step up in quality and durability.
Unlike the job site and benchtop table saws, Contractor table saws are much more substantial, and best left in one location as they may weigh between 200 and 400 pounds.
The increase in weight comes from very stable legs and support systems, as well as a much higher quality cast iron tabletop. The electric motors remain in the 1 to 2 hp range and are often a Belt Drive system.
The larger cast-iron surface and extended table features of contractor table saws allow for easier cutting of large stock. Professional quality rip fences are used on contractor table saws, which enables much faster adjustment for precision cuts.
You will experience a greater sense of precision and control when adjusting the blade height and angle on these better quality tools. Much like the difference in driving quality between a Dodge Neon and Buick Le Saber. (It’s not a Rolls Royce, but it is a big improvement!)
Before the invention of the “Jobsite table saw,” the “lightweight” table saw most used on construction sites was what we now call the “Contractor table saw.” These saws require up to four people to move them. But at the time, that is all they had available to use.
Consider a Contractor table saw if you have a dedicated space for the table saw and wish to make precision cuts for cabinetry and furniture. You will avoid the headache of low quality and inaccurate fence systems.
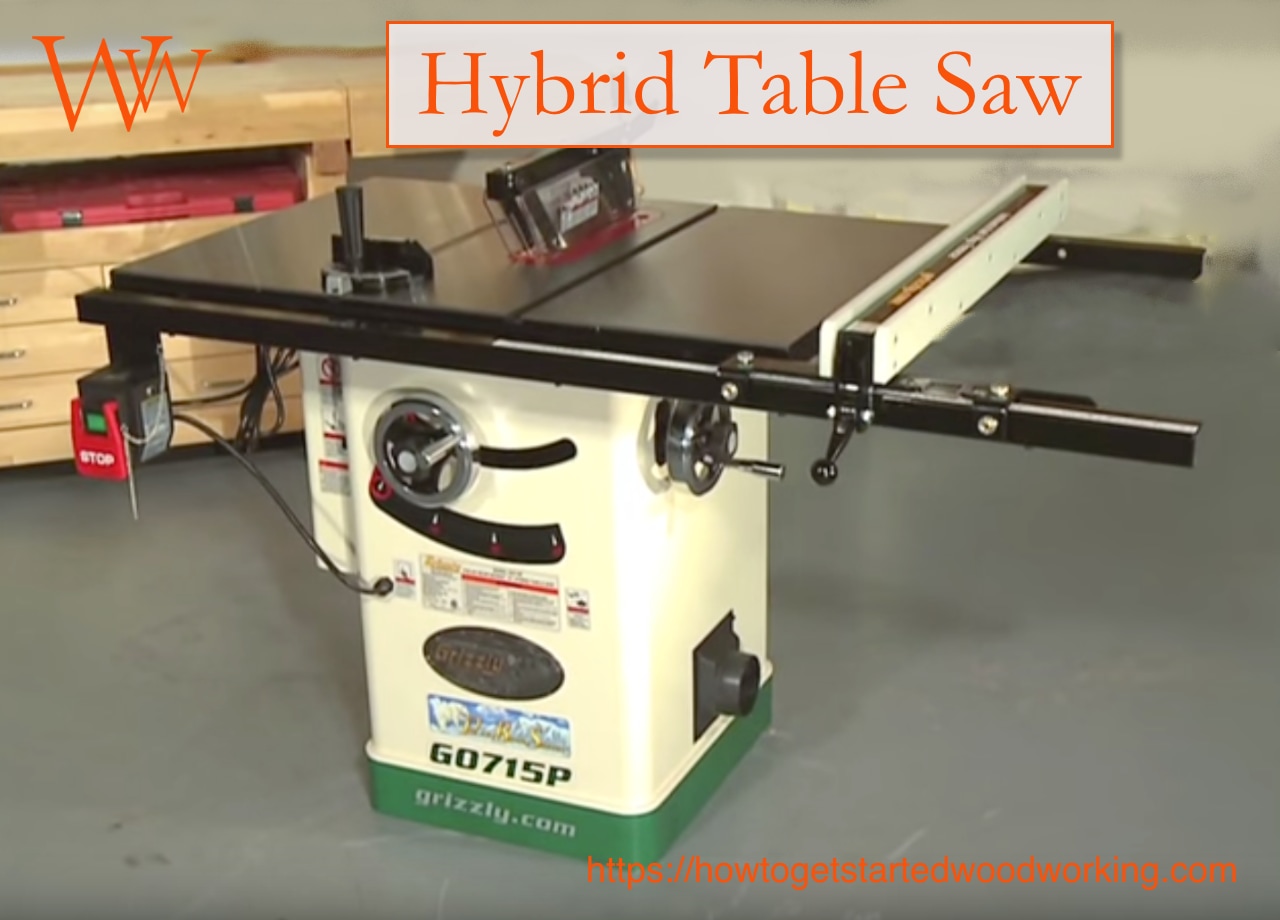
Hybrid table saw
The most basic definition of a hybrid is the bringing together of two elements to make something new.
The two elements that are combined in the hybrid table saw are from the contractor table saw, and the cabinet saw.
A need in the table saw market was observed for a table saw with higher end features, but not as expensive or large as a cabinet saw.
The hybrid table saw combines some of the best features of the cabinet table saw and contractor table saw into an excellent quality tool.
Hybrid table saw features
- a more powerful electric motor up to 3 hp.
- an enclosed base that the table sets on, makes it quieter and allows for more efficient dust collection
- a larger cast iron table surface because they are intended to be stationary
- rip fence systems are very high quality and provide superior results
The heavy top, combined with a solid base, adds better stability and a more pleasing user experience.
Safety features will vary with each manufacturer. Standard safety features should include:
- saw blade guard
- riving knife
- anti-kickback pawls
- hands-free off switch
- SawStop brand saws the ability to sense a finger in the blade and stop in a fraction of a second. (a Feature available on all SawStop brand table saws)
Hybrid table saws are reasonably affordable for dedicated hobbyists and professionals.
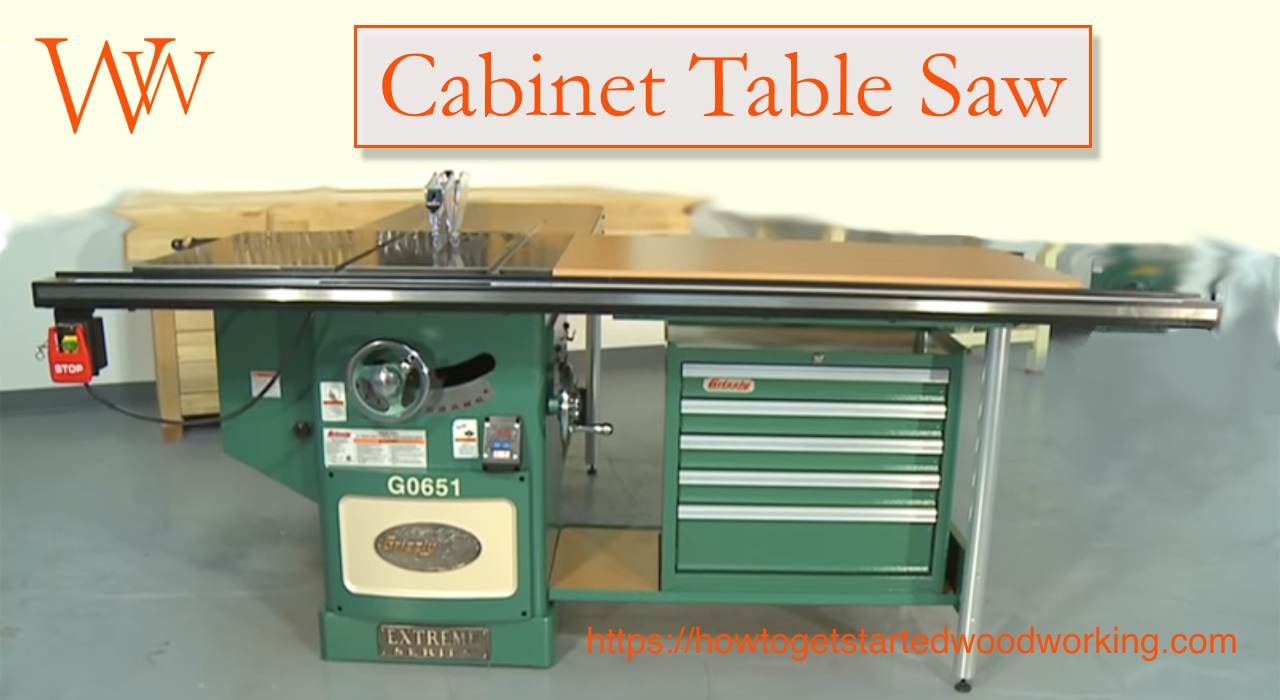
Cabinet table saw
Named either for its primary use, cabinetmaking, or for the cabinet shaped base design, the Cabinet table saw is the industry standard for professional woodworkers.
These are the most fully-featured, robust, and well-made table saws available. A well made cabinet saw is designed to operate for hours at a time in a professional production capacity.
NOTE: Cabinet table saws can last a lifetime or more.
The basic Cabinet table saw weighing in at 450 to 650 lbs (some even more than that) consists of an enclosed cabinet base that houses the motor.
The most common power plant for a cabinet saw is a 3 hp 220 Volt single phase induction motor.
On higher-end Cabinet table saws, the motor enclosure is completely sealed. It is cooled with an electric fan, protecting all the internal parts from shop dust.
The official name for this type of motor is TEFC or Totally Enclosed Fan Cooled
Cast iron table surfaces are much larger and heavier than on the smaller table saws, which contributes most to the overall weight of the saw.
More precise alignment control and the ability to remain aligned through heavy use is one of the hallmark features of a high-end table saw.
NOTE: Time lost to maintenance and adjustments costs money in a professional shop, it doesn’t make a hobbyists experience any better either.
Using the Cabinet table saw is like driving a fine luxury automobile. Blade height and angle adjustments are smooth and controlled. Fence settings are firm and accurate and maintain their position with cut after cut.
Your wood cutting capability is only limited by the height of the saw blade.
In general, all safety equipment comes standard with cabinet table saws:
- blade guard
- riving knife
- splitter
- anti-kickback pawls.
The exception is the SawStop skin sensing technology that is only available on SawStop brand saws.
NOTE:You will likely need an electrician to correctly wire this tool into your shop.
A dizzying array of table saw accessories are available in a multitude of configurations for Cabinet table saws. Some of the more common table saw accessories are listed below.
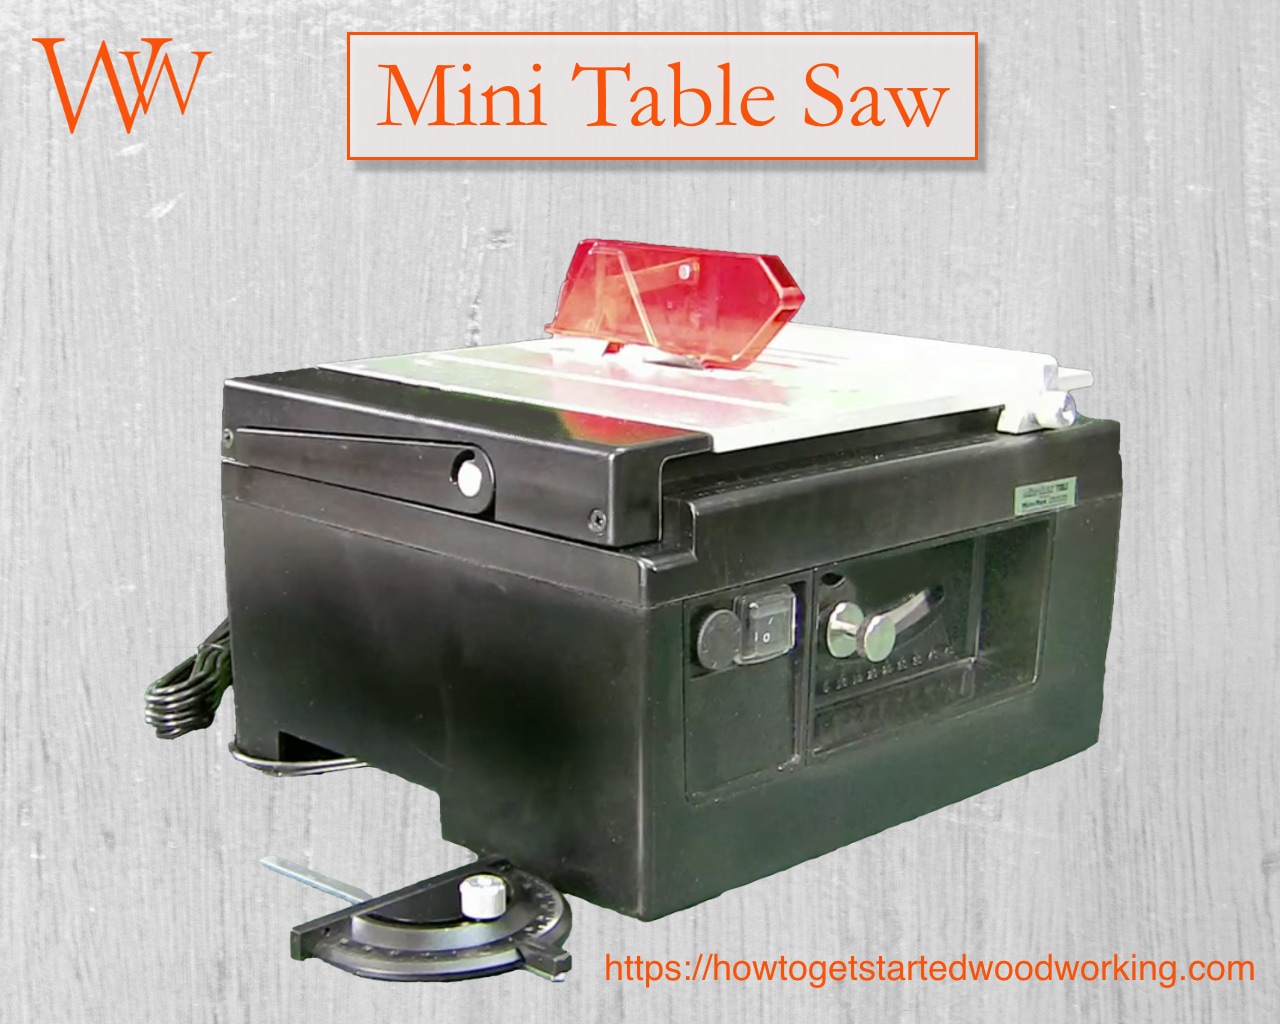
Micro or Mini Table Saw
In sharp contrast to the large Cabinet table saw, the Micro table saw has a significant role in a woodworkers shop.
There are thousands of projects being made by furniture makers, toymakers, model builders, architectural model builders, dollhouse builders, model railroad hobbyists, and crafters of all sorts.
There is a multitude of instances where a 10-inch table saw is far too large for the work you are doing.
Micro or mini table saws are the answer. The terms micro and mini refer to the same table saw tool.
These tiny machines have all of the features of their large counterparts, just much smaller.
Micro table saws are made from steel and aluminum with a table dimension that is roughly 12” x 12” and stand about 7 inches tall.
They are powered by various sized electric motors 1/16 hp to almost 1/2 hp. Saw blade sizes vary from 2 inches to 4 inches and are sold in a wide variety of tooth configurations.
Mini table saws feature blade height adjustment and up to a 45° bevel angle. RPM’s on these motors are often variable from 3500 to 14,000 with the average RPM being 7000 to 8000 RPM max.
Rip fences and miter fences are also provided and are designed to be very accurate. Most models of Micro table saws have a dust collection port that will fit most dust extraction systems or shop vacuums.
The cutting capacities differ with each manufacturer. But most micro table saws can handle wood stock up to one inch thick, as well as various metals and plastics.
Table Saw Accessories

Dust Collection
One of the best things you can do as you begin woodworking is protect your health.
Any type of woodworking creates a lot of dust. Choosing a dust collection system that is appropriate for the tool you have is critical to keeping your workshop environment clean and preserving your health.
Almost every type of wood dust has some kind of irritating properties. They range from mild irritation to causing blisters on your lungs.
Take a look at my post on shop safety and choosing a dust collection system for your shop.

Zero clearance blade plate
One of the least expensive, and best performance-enhancing accessories to a table saw is the zero clearance blade plate or throat insert.
These inserts are sold as a solid plate. To install them, you lower your saw blade all the way. Remove the old blade plate and replace it with the new solid plate.
The saw is turned on, and the blade raised slowly, so it cuts a “zero clearance” slot in the blade plate that perfectly matches the kerf of your saw.
These blade plates help make your cuts cleaner, especially when using thin or very narrow stock.
Zero clearance inserts also assist in dust collection by holding more sawdust below the saw table where the dust collector is installed.
It is recommended to have a zero clearance blade plate that matches each type of material you frequently cut on your table saw.
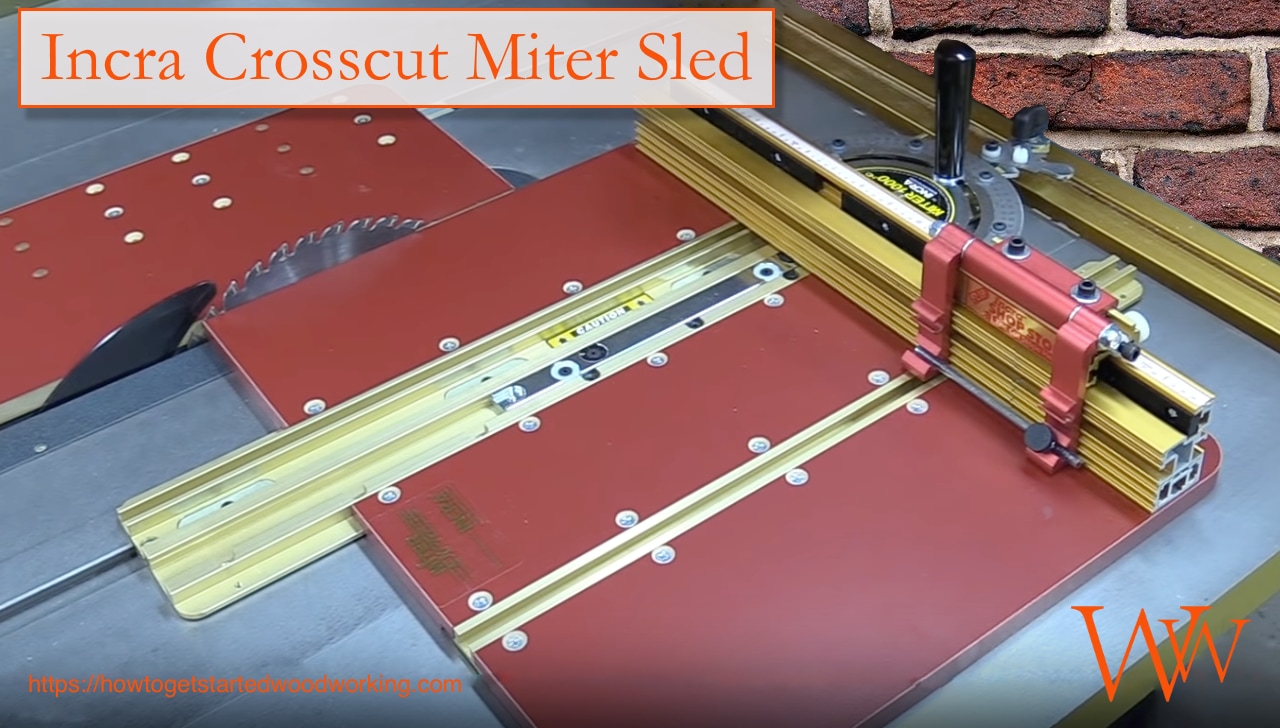
Miter Sled
Almost every table saw will have a miter gauge that rides in the miter slot. One would assume that this would be a useful tool for making precision angled cuts.
Unfortunately, most of the miter gauges sold with table saws except on very high-end table saws are going to be lacking in their precision capability. They seem to be designed for cutting 2 by 4 type construction framing stock.
To reduce frustration, especially for the beginning woodworker, I recommend using a miter sled that rides in the slots on your table saw and produces excellent precision miter cuts. These sleds make repetitive miter cuts a breeze and are quicker and safer to use.
Digital angle gauge

Look for the magnetized angle gauge that has a large easy to read digital display.
This tool gives speedy and accurate readings and is useful for dozens of different projects that involved angles, alignment, and leveling. It is my tool of choice for adjusting my table saw blade angles.
Feather board
Often times, when working with a table saw, you find you have a narrow piece of wood that needs to be held close to the saw blade.
A feather board works like an extra hand.
It is a simple wood or plastic plank that mounts to the top of your table saw. The plank has a row of flexible “feathers” or fingers, about 1/8 inch wide and about 5 inches long.
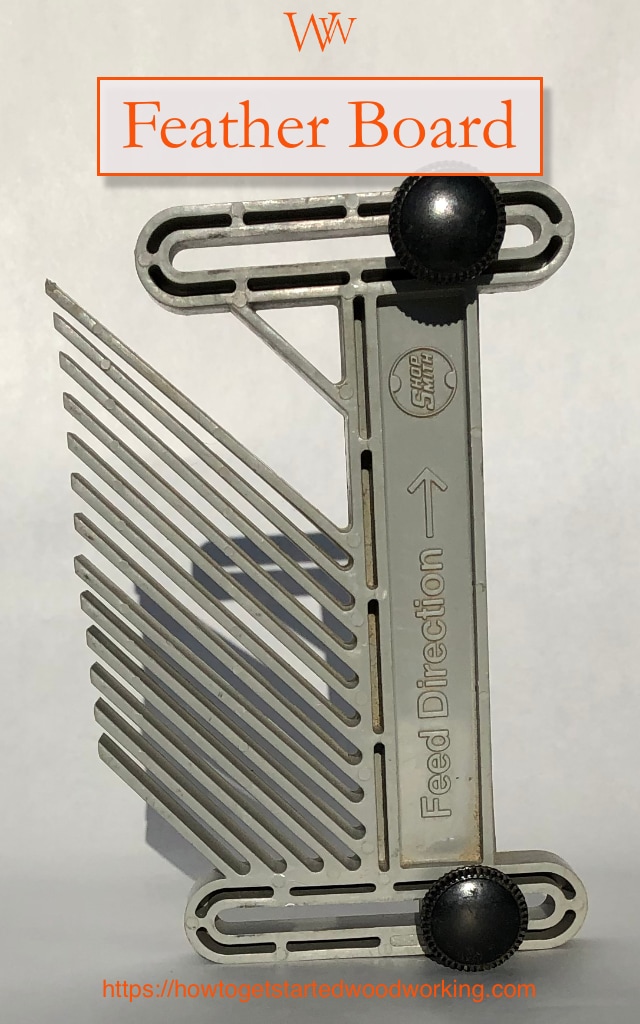
These thin “fingers” are adjusted to flex against the workpiece you are passing through the saw, holding it firmly against the ripping fence or miter fence as needed.
It’s a necessary tool that keeps your fingers away from danger.
Feather boards can be used on almost any machine that has a cutting blade, and a fence such as a table saw, band saw, router table, and radial arm saw.
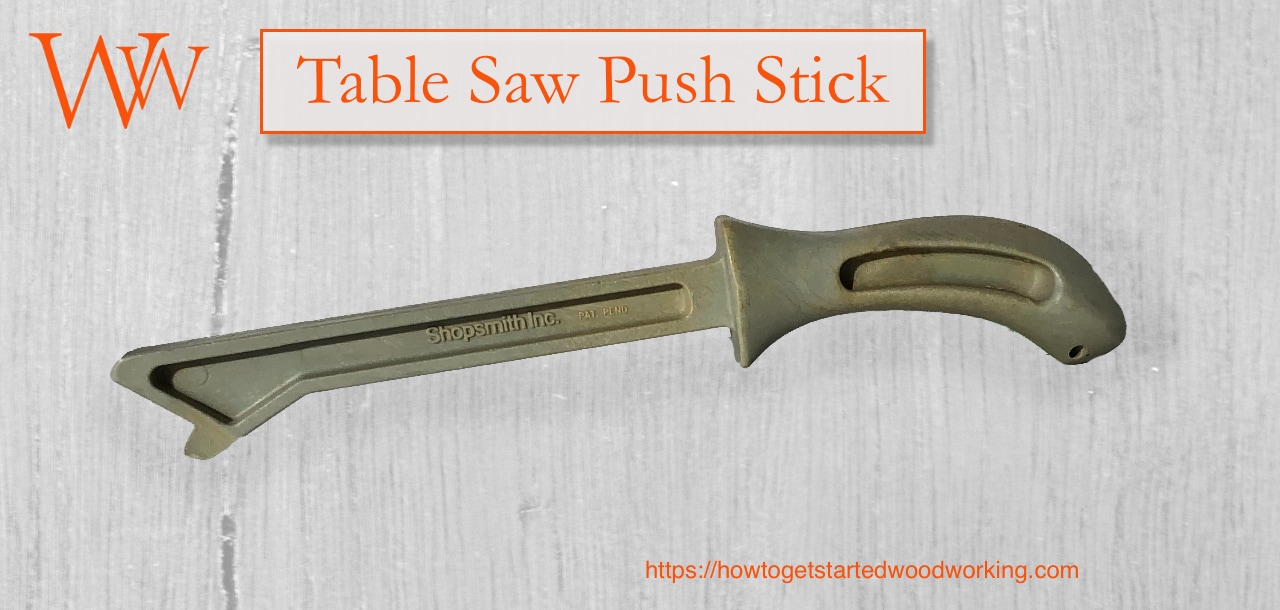
Push stick
Essential for table saw safety, the push stick is the most useful and straightforward device to help you keep all of your body parts intact.
A push stick can be any piece of wood or plastic that is used to push your wood stock through the table saw keeping your fingers a safe distance from the saw blade.
Push sticks come in many different shapes and configurations, from literally a simple wooden stick or a scrap of lumber, to cleverly engineered and manufactured devices.
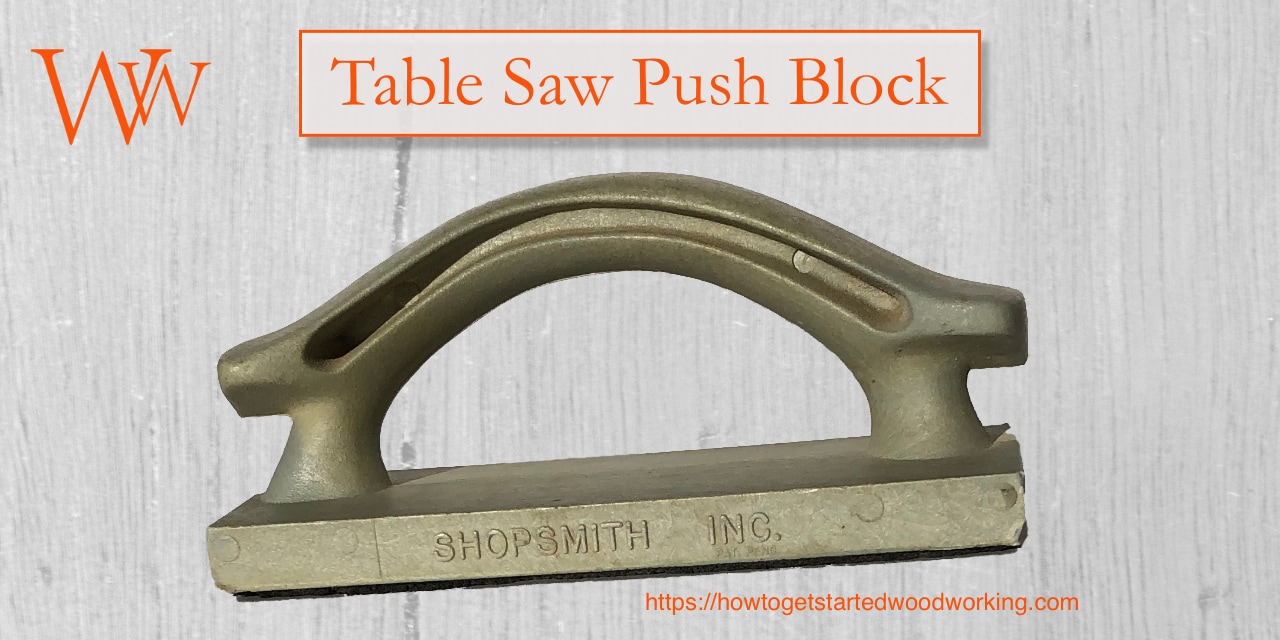
Push block
With almost the same purpose as a push stick, a push block is used to give more control over larger workpieces holding them firmly to the saw table and against the fence while cutting.
Push blocks usually have a handle on the top and a non-slip rubber pad on the bottom to grip wood stock .
Push blocks can be simple homemade blocks or brilliantly designed commercial products that serve a multitude of practical and safe purposes.

Alignment and adjustment gauge
Wherever there is machinery, there is maintenance. I personally like to spend as little time on maintenance as possible and as much time building projects as I can.
Purchasing an alignment and adjustment gauge saves a tremendous amount of time. It allows you to quickly ensure all of your woodworking equipment is in alignment and top working order.
The alignment and adjustment gauge can be used for:
- adjusting table saw blade and miter slot alignment
- check for runout on arbors, spindles, blades, and bits
- measure saw blade and router bit height
- can be used to align table saw fences as well as fences on routers
It can probably be used for hundreds of other tasks that require precise measurement.
Hands-free power switch
This type of power switch is frequently an aftermarket addition to your table saw.
Several different models are available depending on the configuration of your table saw and your preferred method of turning off your machine.

Options include foot-operated floor switches or large paddle switches that are easily operated with one's knee or leg.
Thankfully, several manufacturers are now installing these on their machines.
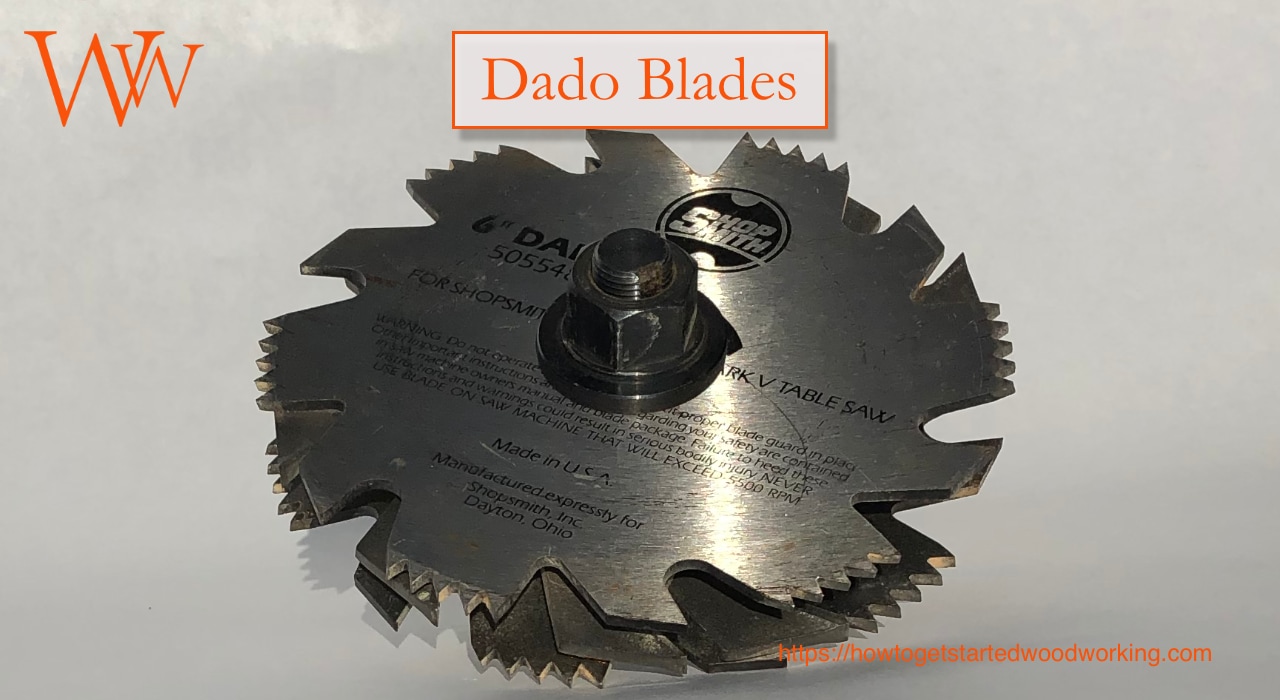
Dado blades
Dado blades come in a “stack” that usually includes two cutting blades and a series of thinner chipping blades.
The cutting blades “dado,” and the chipping blades clear the Wood in between leaving a cut with a smooth bottom.
A dado set can make dado’s and grooves from 1/4 inch to 15/16 inch wide. See more under “What Is A Table Saw Used For” below.
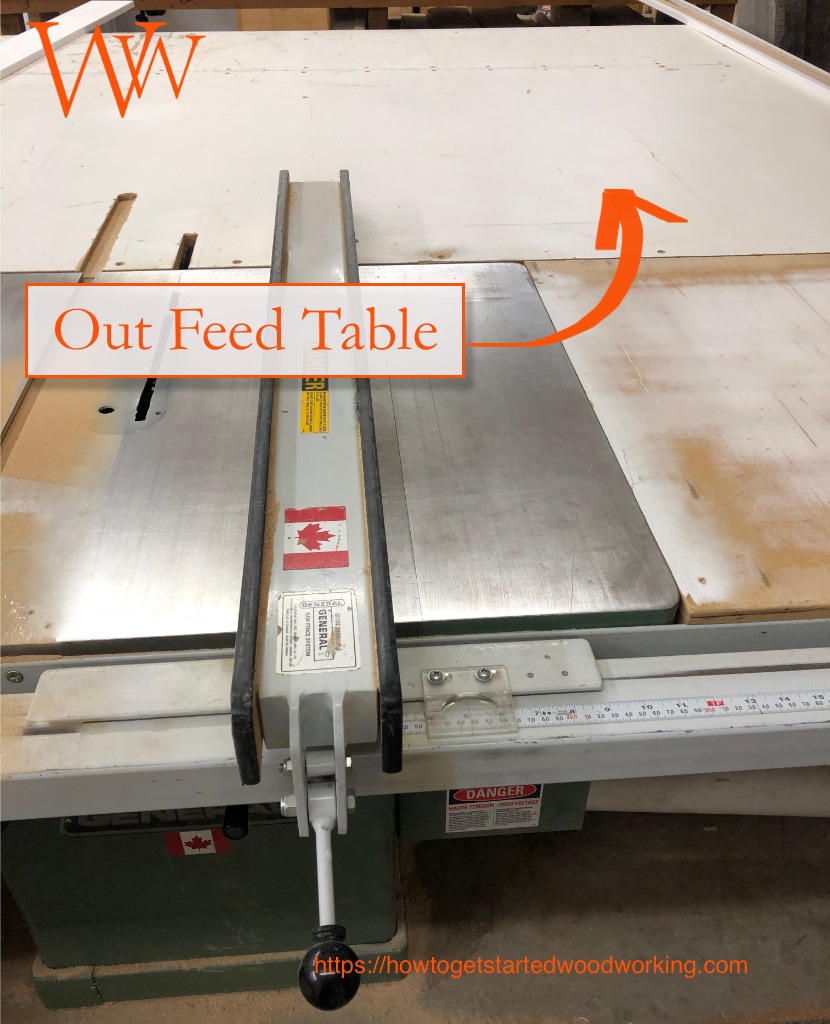
In-Feed and Out Feed Tables
These are essential equipment for anyone cutting large sheet stock on the table saw.
The size of the in-feed and the out-feed table is determined by the actual size of your saw table and the size of the stock you regularly cut.
Most are built so that one person can manage a 4 x 8 piece of material. See more below under “Cutting Sheet Goods on a Table Saw.”
What Is A Table Saw Used For?
A table saw is used for cutting wood or similar materials in a straight line.
There are several types of cuts listed below.
Ripping cut
Cutting wood in a direction parallel to the wood grain.
Crosscut
Cutting wood in the direction perpendicular to or across the wood grain.
Mitre or Angled cuts
Cutting wood at an angle other than 90° to the face of the wood.
Bevel Cut
Cutting wood at any angle other than 90° to the edge of the wood.
Dado Cuts
A dado cut is for cutting slots in the wood, particularly against or across the grain when making precise joints.
Dado cuts are usually from 1/4” to 15/16” in width. Dado cuts require a specific type of blade called a Dado blade.
Groove cuts
Like a dado, a groove is a "slot" cut in the wood, but running parallel to the wood grain.
Rabbet Cuts
A rabbet is a two-sided recessed cut that is open to the end or the edge of your workpiece. Rabbet cuts are often made with a dado blade
Joinery
Different combinations of cut can allow the creation of many different wood joining processes. Some of the common joints made on the table saw are:
- bridal joints
- butt joints
- dado joints
- dovetailed joints
- hedge rabbets, and rabbets
- finger joints grooves
- half a lap joints
- halved joints
- miter joints
- splice joints
- tendon joints
- tongue and groove joints
Crown Molding
You can make crown molding on your table saw by mounting an angled fence across your saw table.
This technique falls into the slightly advanced table saw skill category, and requires a fairly complex setup. But once you understand the concept, it is relatively easy.
I won’t go in-depth here. Just know that it is possible, and not terribly difficult either.
Using A Table Saw
Check these critical features before using the table saw for the first time. The following adjustments will help you to operate your table saw as safely as possible.
First, be sure that you have the proper safety equipment.
You should have eye protection and hearing protection. Having experienced kickback that nearly sent a narrow piece of wood into my abdomen, I recommend wearing a canvas or leather woodworking apron when working on a table saw.
Take a look at your clothing, and make sure you are wearing a short-sleeve shirt or that sleeves are rolled up and out of the way. Any long hair should be pulled back and tied securely out of the way.
NOTE: Do not wear gloves when using a table saw. Gloves will prevent you from feeling how close your hand is to a saw blade. If a rotating saw blade touches a glove, it is more likely to snag and pull the user's hand or arm into the blade, causing far greater injury than no glove at all. Learn more about woodshop safety here.
Table Saw Blade Adjustment
If it’s your first time using a new table saw, or a table saw that is new to you. Unplug the saw and take a few minutes to check these adjustments.
Take your combination square and lay the squaring head or anvil, flat in the miter slot. Extend the ruler blade, so it touches the front tooth of the saw blade while laying on the tabletop and record the measurement.
Next, slide the combination square down the groove and see if the measurement is exactly the same from the miter slot to the back tooth of the saw blade.
These two measurements should be exactly the same, if they are not, you need to adjust the saw blade until they are as close to exactly the same as you can get them.
Table saw rip fence alignment
Using your combination square again, place the squaring head in the miter slot at the front edge of the table and extend the blade to and even measurement 4 to 6 inches, for example.
While holding the combination square firmly, slide the rip fence and lock it in place when it touches the combination square.
Now slide the combination square down the miter slot to the backside of the table. Is the fence precisely the same distance from the miter slot?
- If the answer is yes, your fence is aligned.
- If the answer is no, you need to adjust the fence so that these two measurements are exactly the same.
NOTE: Blade and rip fence alignments are most essential to prevent kickback from happening.
Bevel adjustment
The bevel scale on virtually every table saw from Bench-top to Cabinet is intended to be a general guide.
You cannot trust this scale as an accurate test of angle measurement.
Therefore, you need a reliable way to determine what angle is being set with your bevel adjustment handle.
First, you want to check the 90° angle stop. This is the one with the blade straight up and down perpendicular to the saw table.
Second, check the maximum 45° angle stop. There are two tools you could use to easily do this.
1. The combination square can be used by removing the blade and using the squaring head, check the 90° angle between the table and the saw blade.
Next, use the 45° angle on the squaring head and make sure the 45° bevel angle is accurate when you reach the 45° angle stop. If either of these angles is not entirely accurate, use the adjustment screws on your table saw stops to correct them.
2. The most straightforward measuring device is a Digital Angle Gauge. I mentioned this tool above in the accessories section of this post. Simply place the Digital Angle Gauge on the saw table surface, and zero the gauge.
Next, attach the magnetic gauge against the saw blade and take the reading. If it is within 1/10 of 1°, you should be fine. Any more or less than that, use your adjustment screw to make it as accurate as possible.
Leaving the gauge attached to the saw blade, rotate the bevel adjustment handle until it is at its maximum 45° setting.
Again, if the gauge reads within one-tenth of one degree, it should be fine. If you have any more variance, you should use your adjustment screws to make it as accurate as possible.
Once your table saw is fully adjusted, double-check, and make sure you can easily reach the shutoff switch.
Now that you’re ready to use the table saw, be sure to stand to the side of the saw blade as you are cutting. This way, you will be out of the direct line of fire in case of kickback.
Cutting Sheet Goods
Almost everyone is going to need to cut a full-size sheet of plywood, melamine, or any of several different sheet goods on their table saw.
It is worth taking the time to make sure you have one or two people to help you manage the large sheet.
If human assistance is impossible, make sure you have proper in-feed and out-feed tables.
The biggest problem with sheet goods is they are flexible. While cutting, the tensions in the flexing wood cause it to shift.
As the wood flexes, it can bind and stop the saw blade making significant stress on your table saw, and an inferior cut on your expensive wood products.
A good helper can hold the wood sheet level, and receive the cut wood off the back end of the table saw. This person also is vital to assist you in keeping the wood sheet aligned against the rip fence.
The best option with and without a human helper is to build or purchase in-feed and out-feed tables. I’ve mentioned one or two of them in the Table Saw Accessories section above.
These tables are designed to attach flush with the top of your table saw effectively increasing the surface area of your saw. When properly installed, an entire 4’ x 8’ sheet of material can rest flat and supported on your saw table.
The surface of these tables is often melamine or similar material that is smooth and allows the wood to slide freely across while sawing.
Table Saw Maintenance
The purchase of the table saw can be a sizable investment, so regular maintenance is essential to getting the most from your table saw with every use. A consistent table saw maintenance plan will also giving you many years of worry-free service from your tool.
Is it time to clean your table saw?
Perhaps the blade height and bevel adjustments aren’t turning smoothly.
Does it make gritty groaning sounds?
Then it’s probably time to run through some simple maintenance procedures that will make your table saw work like new again.
1. Be sure the table saw is unplugged or disconnected from power. Remove all the access panels to the cabinet or disconnect the motor and belts from the back end of a contractor saw. Remove the blade plate, saw blade, and blade stabilizer (if included)
2. Inspect your saw blade for pitch and resin buildup and clean it as necessary. Inspect the blade stabilizer and washer, ensuring that they are smooth, clean, and not warped.
3. Use a vacuum with a crevice tool and a paintbrush. Clean the loose and built-up clumps of sawdust from the interior of the cabinet. Be sure to clean the underside of the table and motor.
4. Rotate the arbor assembly or bevel adjustment. Clean any more sawdust from this area and use a few blasts of air from an air compressor to clear any remaining dust. Inspect the surfaces of the bevel angle stops to ensure you will have correct settings.
5. Inspect your worm gear and sector gear, clean them with a brass brush and the vacuum or air compressor. Hard to remove buildup can be dissolved with paint thinner or WD-40, just be sure to wear eye protection when scrubbing parts with solvents as they splash easily.
Wipe away as much solvent as possible with a rag.
6. Arbor bearings are usually sealed and will not require lubrication. If in doubt, consult your owners manual.
7. Lubricate the worm gear, sector gear, and the curved trunnion slots with a silicone-free paste wax with such as Johnsons paste wax. Use an old toothbrush or something similar to brush paste wax on to the gears. Be sure to work the gears several times, then wipe off any excess wax.
8. Lubricate pivot points for the Arbor assembly with an aerosol lubricant like white lithium grease. Be sure to apply it with the straw attached, and wipe off any excess.
9. Check the arbor flange, it looks like a large washer with a raised center that rests between the saw blade and the nut and holds the saw blade in place. Be sure that it is flat by laying it on your table saw top. If there is any wobble or unevenness in your arbor flange, it needs to be replaced.
10. Check the Arbor by twisting it with your fingers and wiggling it in and out and up and down. Any side to side play or noise means you have a bearing problem that needs prompt attention.
11. Blow the dust from all exterior surfaces of the table saw, especially the rip fence and fence locking mechanism. Put a light coat of paste wax on all these surfaces allow to dry and wipe off any excess wax with a rag.
12. Cast iron table saws have a tendency to rust, especially in high humidity environments. Regularly applying a thin coat of Johnson’s paste wax to bare metal surfaces will keep them from rusting.
The paste wax also serves as a lubricant that makes sliding wood across the tabletop much easier. I apply Johnson’s paste wax to any metal surface, aluminum, iron, or steel that cutting material is expected to slide across. It makes a big difference!
History of Circular Saws
I decided to include a brief history of the circular saw, which, of course, led to the table saw.
It feeds my nostalgic senses to know the history behind a tool I am using. I hope you find this section inspiring too. Most of the information is gleaned from several out-of-print woodworking books located on the Internet archive.
I have placed the book titles and links to them below. They are a fascinating resource for anyone who wants to appreciate woodworking tools and machinery.
I personally find it interesting that there are many simple tools without which our modern civilization would never have happened. The saw is one of those tools. Since creation, mankind has been faced with the need to cut wood into useful shapes. It seems historians are generally concerned with other issues, so the volume of information is somewhat limited.
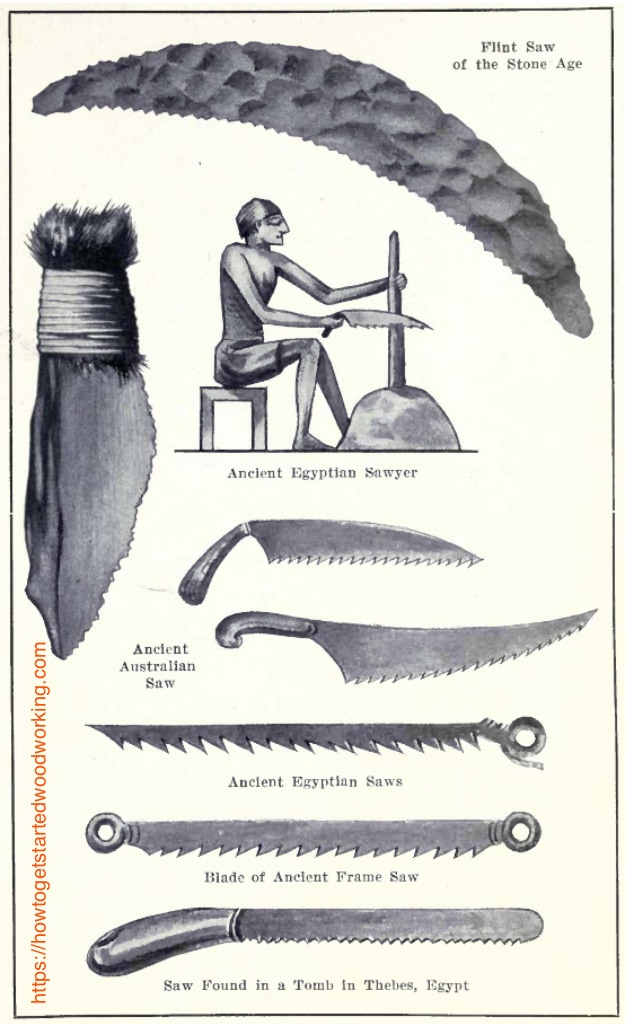
It is evident from this image of ancient saw types that there was very little development in the design of a saw blade from prehistoric times until the 18th century.
Development of the Power Saw Mill
A noticeable increase in saw development began with the introduction of the power mill. Starting in the 13th century, the use of wind power and water wheels to drive reciprocating or up and down sawing machines paved the way for later improvements.
Before the invention of the power mill, the method for sawing logs lengthwise into usable timbers was to dig a long pit. One man would stand in the pit, the log would be rolled onto a frame, and with another man standing above, they would work together to saw planks down the length of the log. This is called a “pit saw.” Many hand-sawyers were employed in this work.
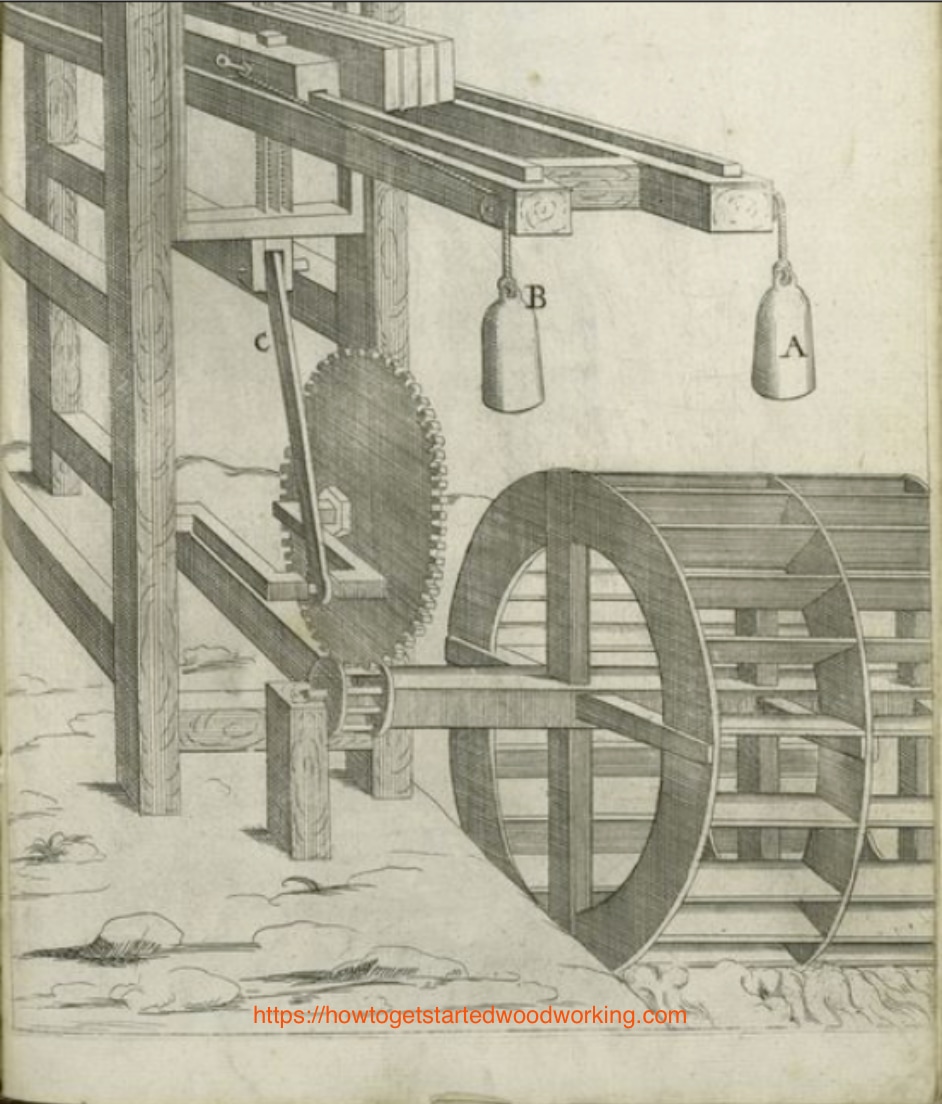
Rare Book Division, The New York Public Library. (1701). Plate XI. An engine to saw wood very readily by the force of a water wheel. Retrieved from http://digitalcollections.nypl.org/items/510d47db-bed2-a3d9-e040-e00a18064a99
As early as 1322, Germany had water-powered sawmills. Holland also followed suit, and a Dutchman named Cornelis Corneliszoon patented his sawmill in 1593. His pitman arm device converted the rotational energy from the windmill into the up and down motion required for the reciprocating saw blades, in 1597.
England lagged behind by centuries due to fierce opposition from the hand-sawyers. Indeed, there were other economic forces at play in England as well. Still, had English Sawyers been early adopters of sawmill technology, some things may have played out differently.
I share that portion of the history just to illuminate how long it took to go from the reciprocating saw blade to the development of the circular saw blade.
I find it very interesting that despite England's initial resistance to change. The first circular saw blade was patented in England by Samuel Miller on August 5, 1777.
The practical use of circular saws began in Holland nearly a century earlier. Still, in history books, patents seem to win the prize.
The rapid development in circular saws took place chiefly in England and especially America.
The first circular saw in the United States is said to have been produced by Benjamin Cummings circa 1814 in Bentonville, New York.
Benefits of progress
- Two men operating a pit saw could 120 to 200 feet of lumber per day.
- The water wheel powered reciprocating saws could produce 2000 feet of lumber a day
- The average Circular sawmill could produce 10,00 feet of lumber per day
Between the invention of circular saw blades and the early 20th century, innovation and technological development exploded such that by 1920 there were many versions of our modern table saw used in industrial production.
Many of these machines were multipurpose and creatively designed to accomplish virtually any woodworking task.
Notable US circular saw patents
The following circular saw patents demonstrate the advancement in circular saws and the development of the table saw.
There are several hundred patents to choose from, these are merely a representative sample.
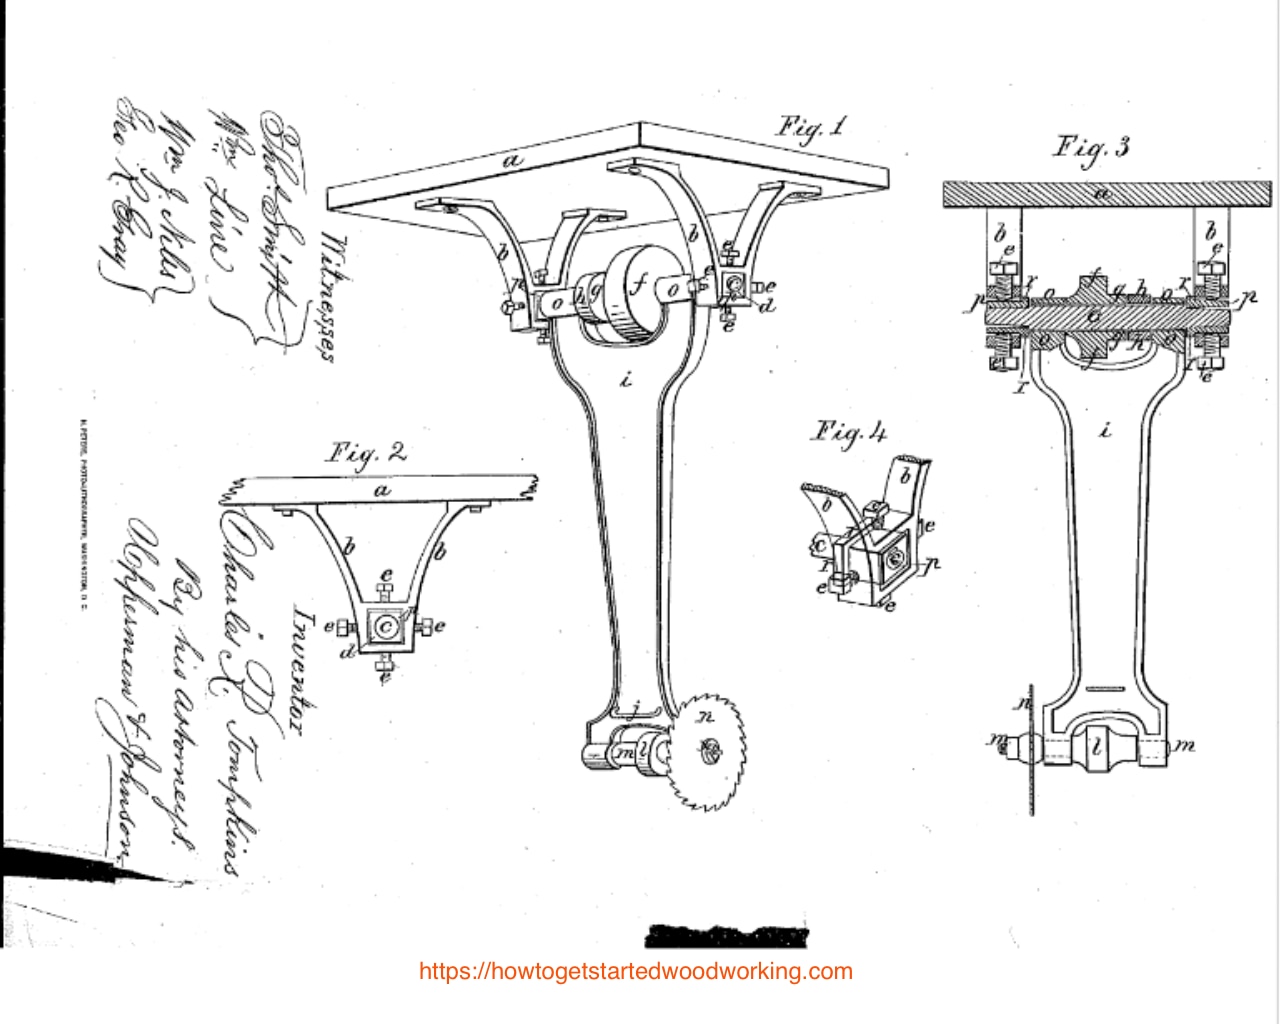
August 31, 1869, Charles R. Tompkins—Improvement in hanging circular saws.
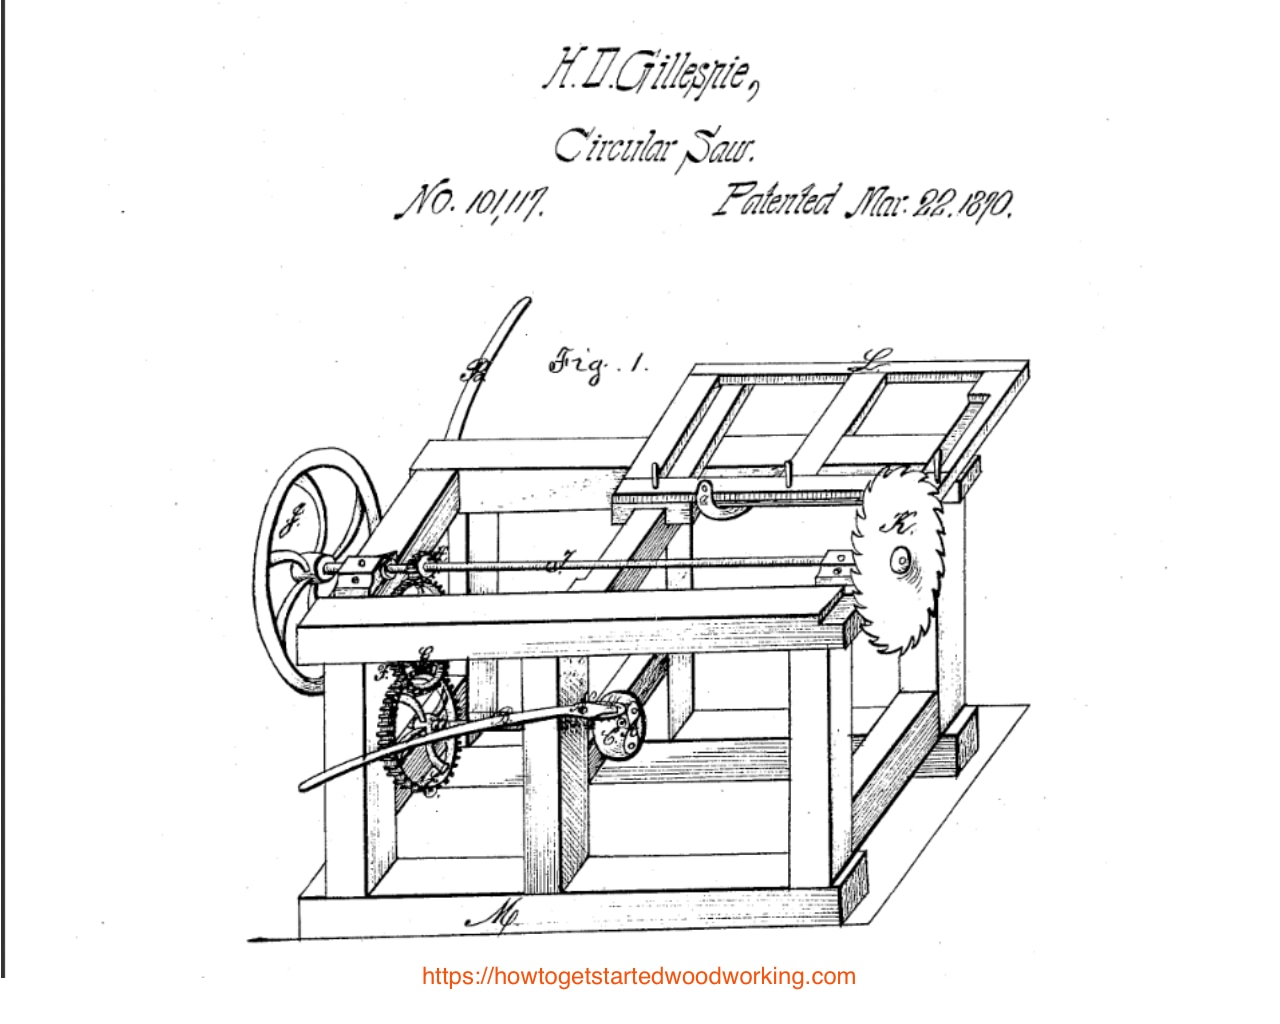
March 22, 1870, H.D. Gillespie—Circular Saw: A human-powered Circular saw requiring operation by three men. Two men operated levers that provide power. The other man worked a sliding frame that fed the wood into the cutting apparatus.
“By these means, the wood is expeditiously cut without the aid of steamed or other power outside the human frame.”
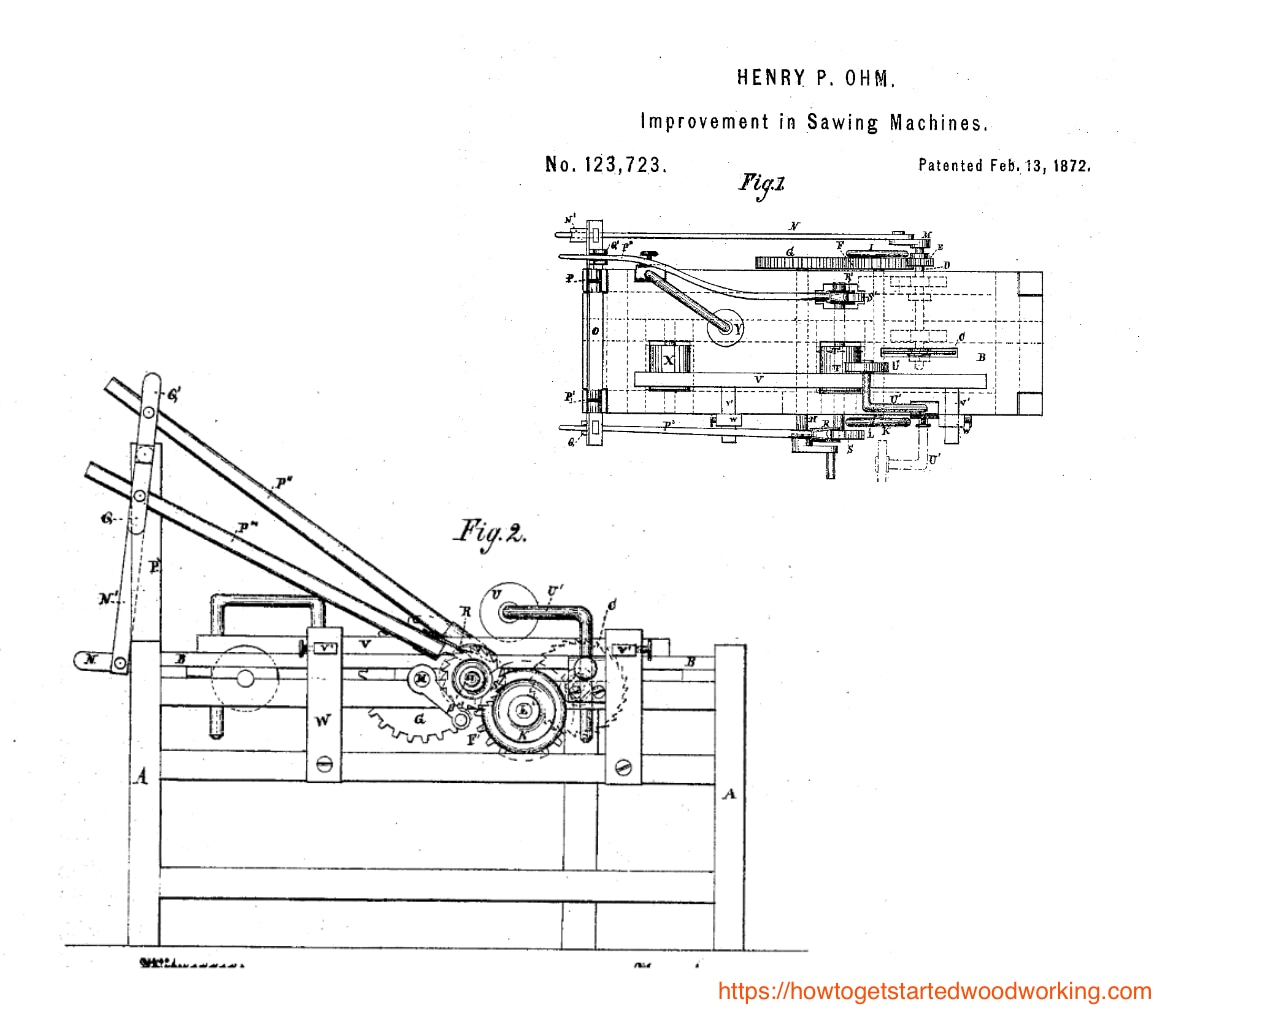
February 13, 1872, Henry P. Ohm—Improvement in Sawing Machines:
“This invention relates to an improvement in the portable sawing machine. It is intended especially for working up lumber and performing other light work. It is also equally applicable for cross-cutting logs."
This invention improved the way lumber was fed into the saw, and how driving power was applied to the saw.
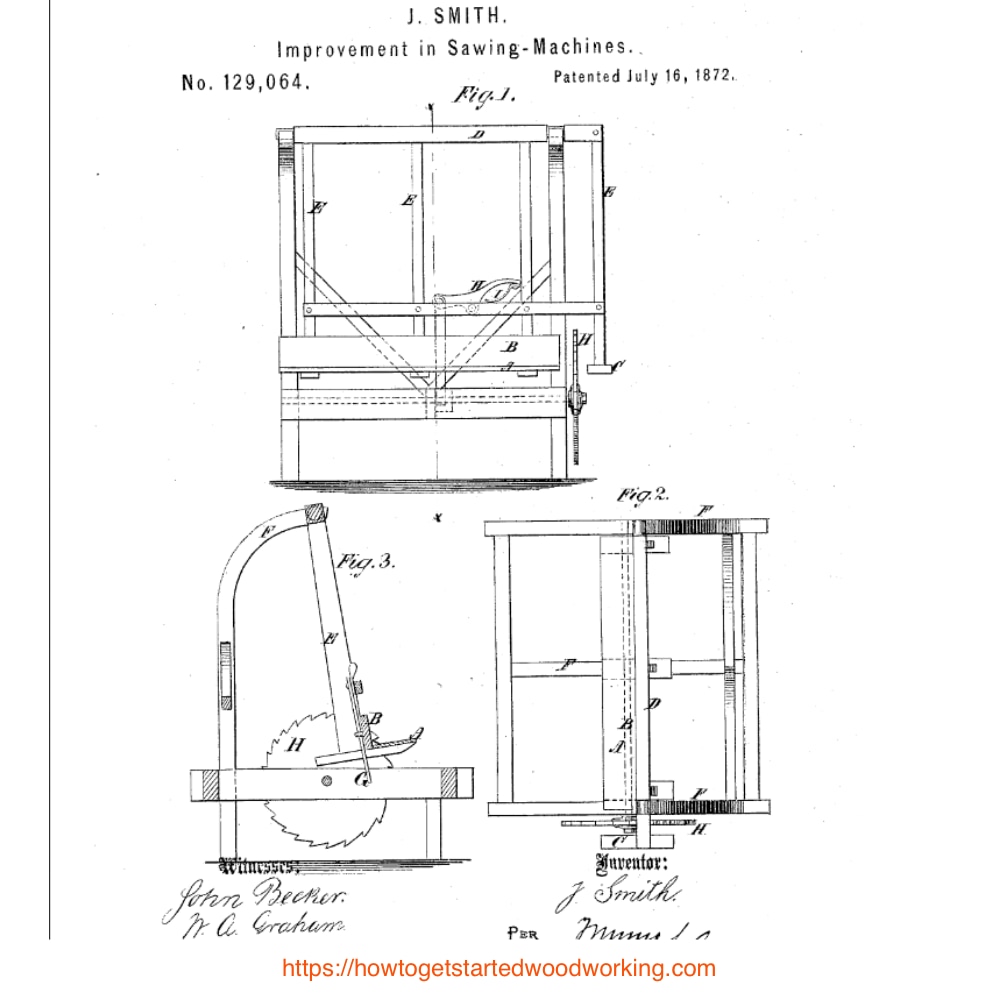
July 16, 1872, Joseph Smith--Improvement in Sawing Machines:
Joseph Smith invented saw table for a cut off saw suspended overhead. It had a unique latch that, when released, utilized gravity to feed the saw table and it’s attached load into the saw.
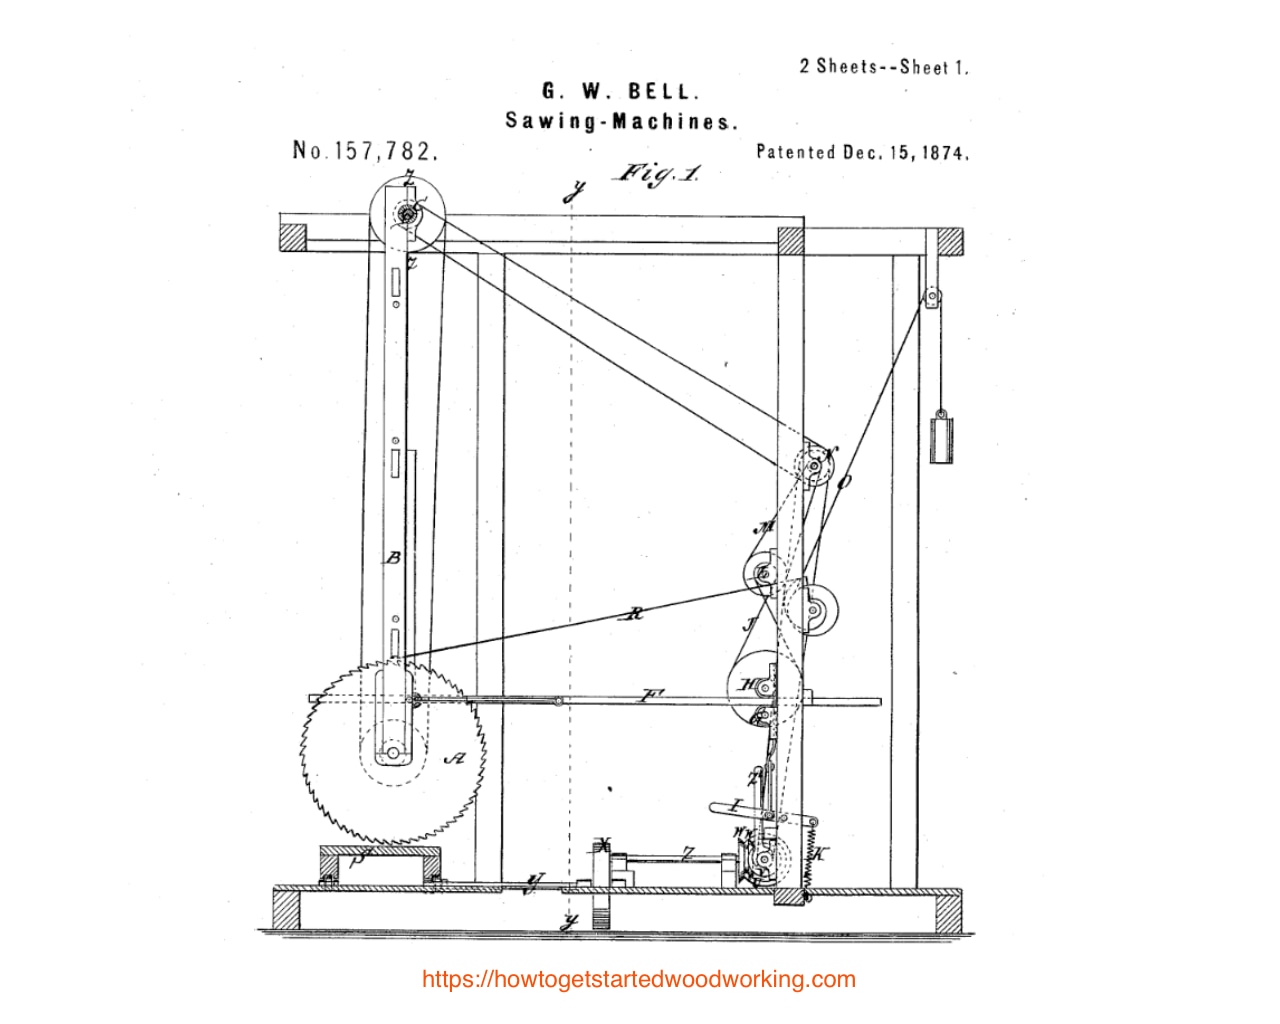
December 15, 1874—G.W. Bell—Sawing Machine
A swing arm type cutoff saw designed to swing the saw out-of-the-way, allowing the log to be shifted along for more efficient cutting.
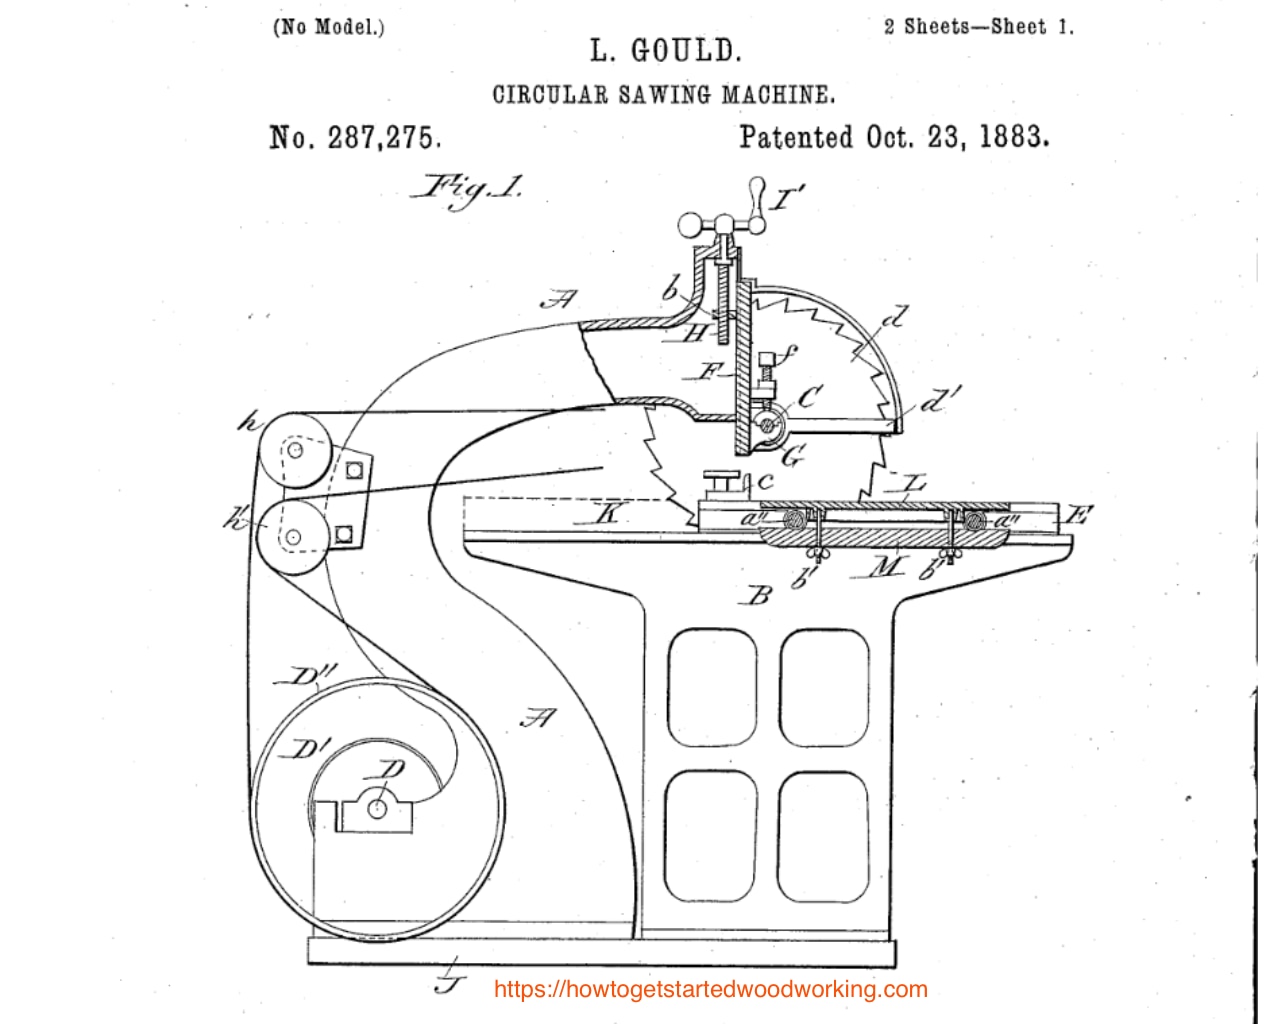
October 23, 1883—L. Gould—Circular Sawing Machine
Lyman Gould invented an improvement to sawing machines with an adjustable overhead cutting apparatus and a “sliding carriage for supporting and feeding of the work.”
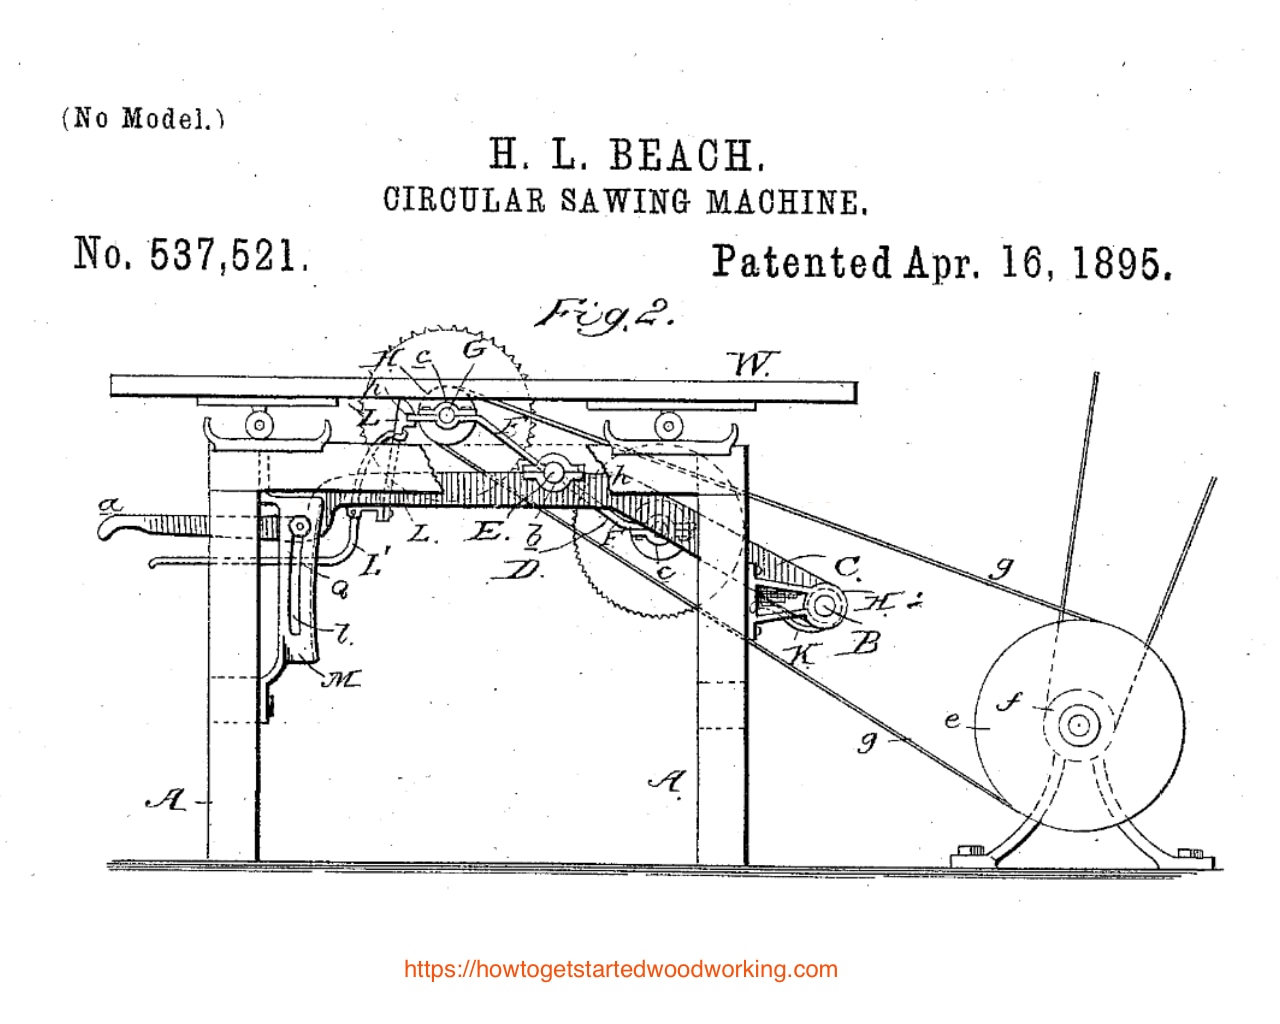
April 16, 1895, H.L. Beach—Circular Sawing Machine: Henry Beach describes his Circular saw with two separate sawblades installed that can be quickly interchanged. “The saw carrying frame has two arms radially disposed and at the ends these arms… saw arbors are mounted,.. for instance, a ripsaw on one arbor and a cross-cut saw on the other.”
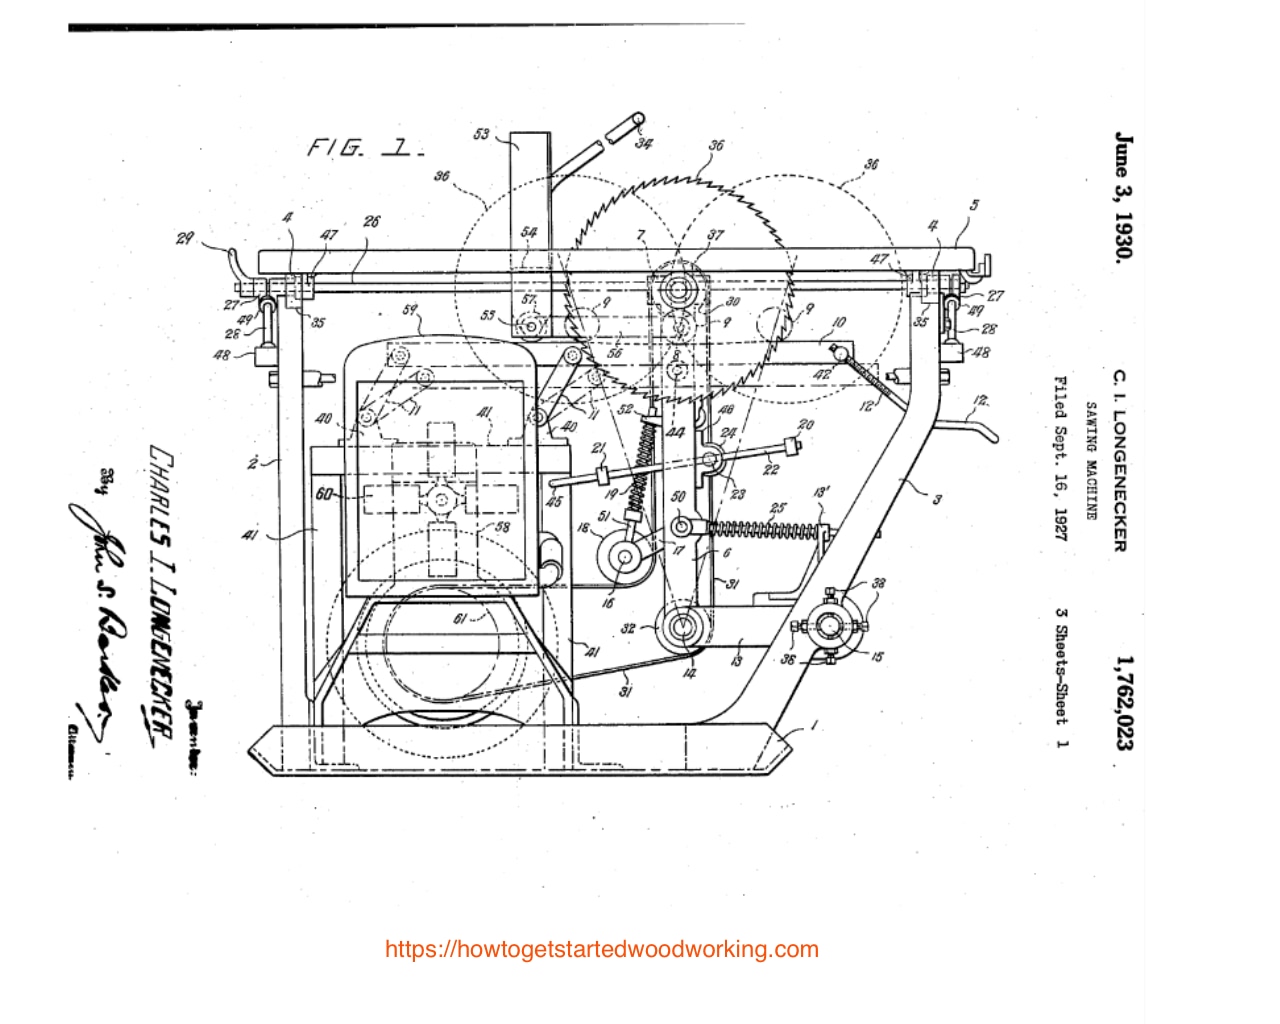
September 16, 1927, C.I. Longenecker—Sawing Machine
Charles Longnecker sought to produce a sawing machine that was lightweight and compact. It had a capacity for doing a wide variety of woodcutting work. C.I. Longenecker Pat. # 1,762,023
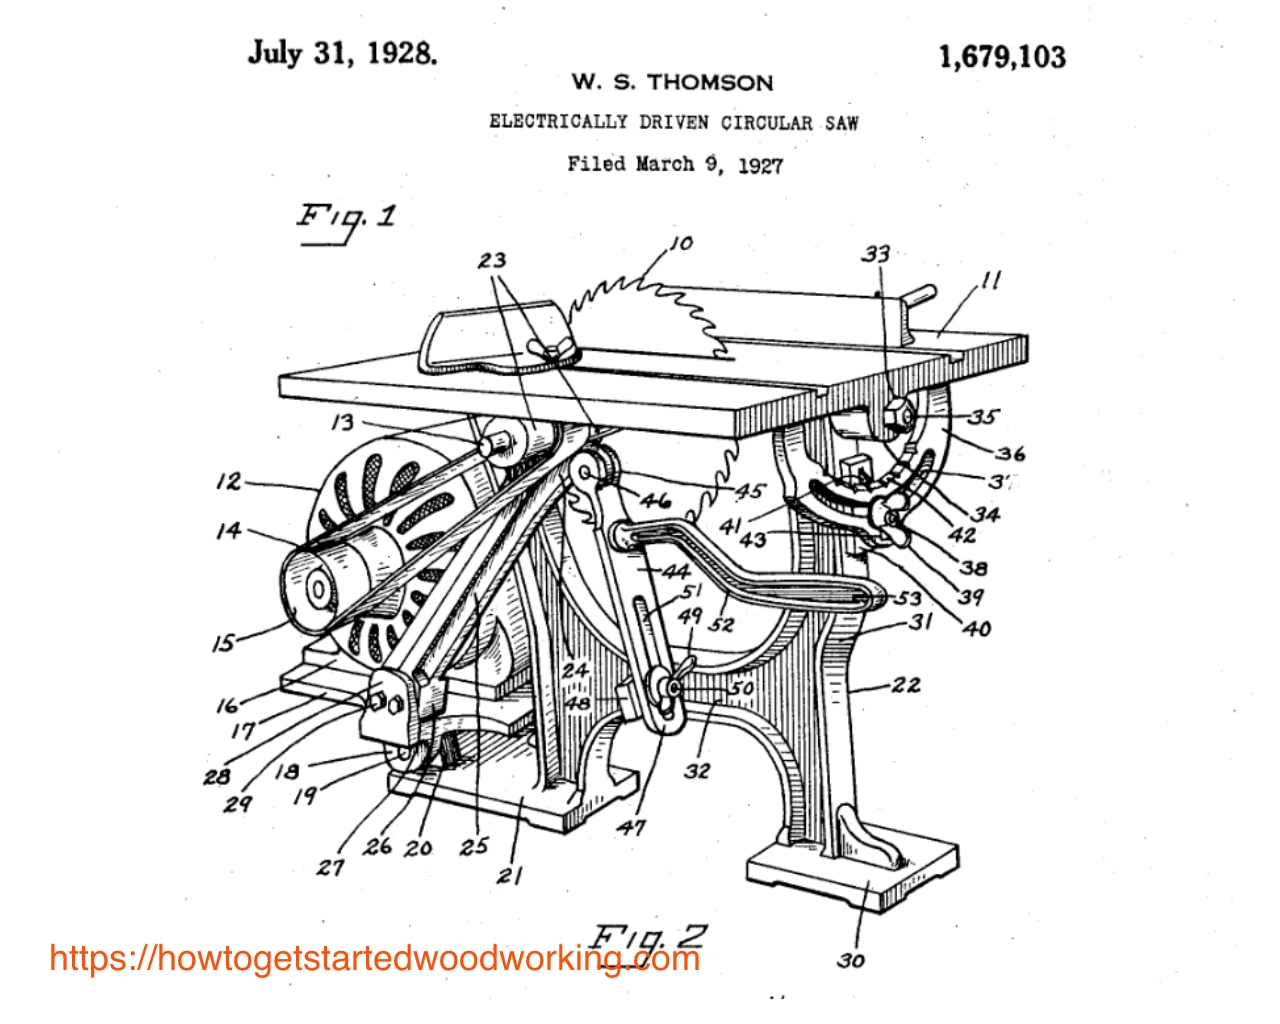
July 31, 1928, W.S. Thomson—Electrically Driven Circular Saw
The William Thompson table saw is one of the first patents for table saws that features an electrically driven motor. Many of the blade height and bevel adjustment mechanisms we are familiar with on our modern table saws are found here.
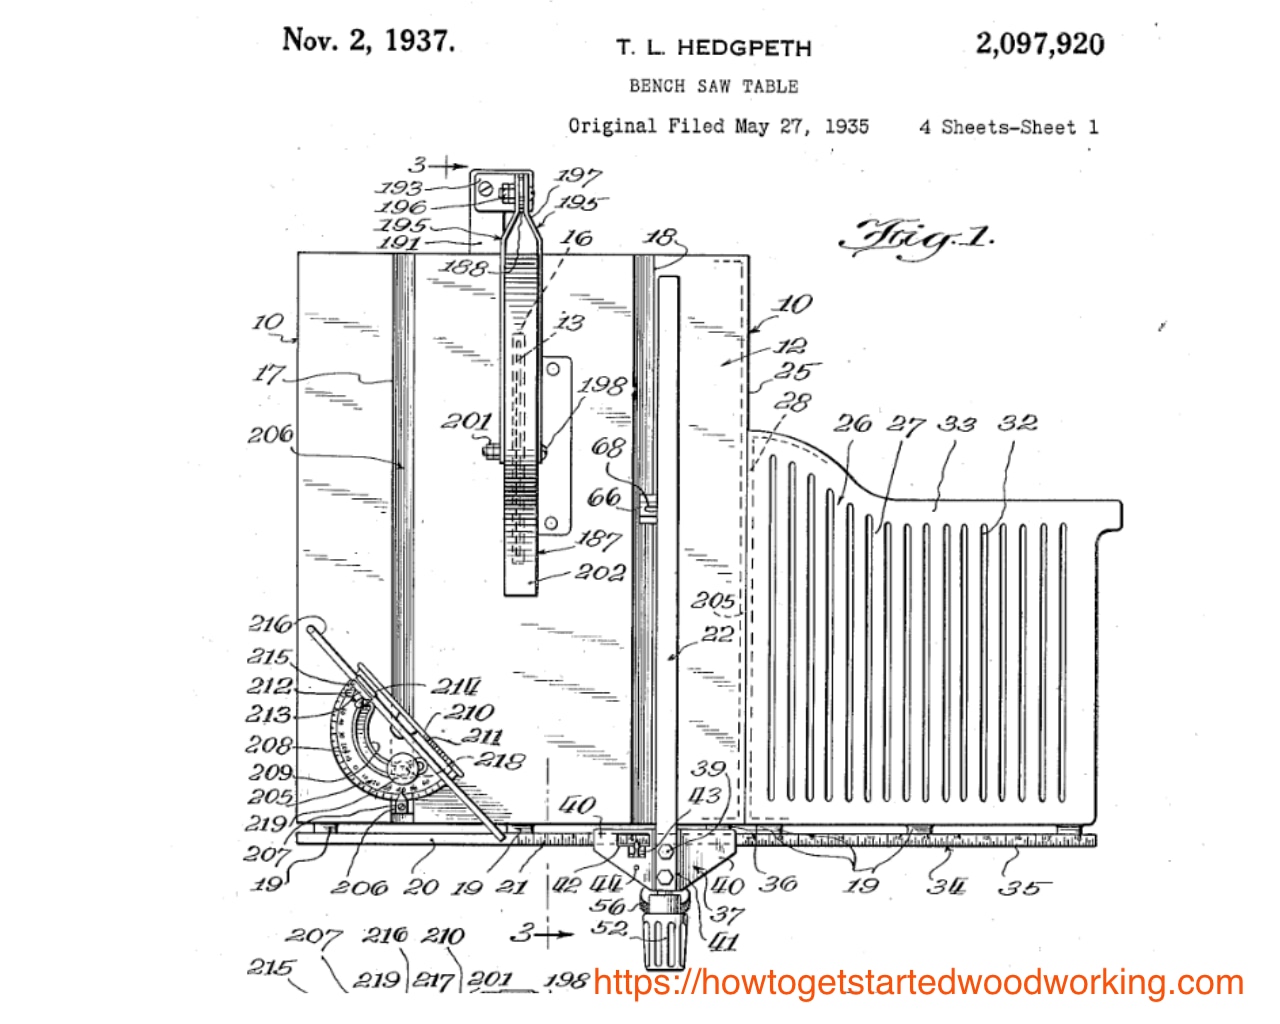
November 02, 1937, T.L. Hedgpeth—Bench Table Saw
This table saw patent shows that the development of guide slots running parallel to the blade with a miter fence to the left and the ripping fence to the right.
This saw was also designed for simple construction, making it an affordable option for homeowners or small woodworking operations.
A long discussion of these fantastic tools isn’t precisely the scope of this short history. If you would like to read further, take a look at the volume “American Woodworking Machinery for Vocational Training.”
It’s a great perspective on how far woodworking technology advanced in just 150 years from the 1777 circular saw blade patent to 1927. You can click the link on the title above to access it yourself.
Conclusion
I’ve had a great time putting together this post about table saws.
I hope you now know the differences between the six types of table saws and for what situations they are most suited.
The knowledge of the most common parts of the saw, and safety concerns will guide you as you choose the tool that is best for you. I hope you have a better idea of what table saw accessories are available too.
We learned about what a table saw is used for. We also went over some basics on how to safely set up and operate the saw.
If you read this entire post, you probably know more about the table saw its maintenance and history than almost any of your woodworking friends.
Speaking of friends, please share this post with yours! I’d certainly appreciate it. Visit us on Facebook too!
I'd like to thank my friends at Windsor Plywood in Great Falls MT, for helping me out with this post too! You can find them on Facebook @windsorplywoodgreatfalls.
Please leave me a comment, especially if I missed something important or you want to ask me a question. I love to hear from readers!

Hi! I’ll spend some time at home due to the situation world wide. I always like to spend time in my woodworking shop next to my garage, but I’m really a newbie when it comes to wood work.
I really appreciate all the details you have mentioned concerning a table saw and the diverse types of table saws there are. I’ll bookmark your post for more useful information. Thank you very much!
Hey Abel!
Thanks for the comments! I hope you have more time to get into your shop and enjoy creating something from wood.
All the best to you as you get started woodworking!
Greg
First, I want to give you thanks for publishing such an astonishing article. While reading your article I learned many things about the table saw, like how it works and what is the table saw. Your article is very informative to me.
After going through your article I have lots of information about table saw. Especially how you have described step-by-step about it, and how it works, and why we should use it. You have described all these things perfectly.
Thanks for the kind words! I’m glad you enjoyed the article!
Wow, you have so much information about this woodworking tools here especially the table saw. My dad loves cutting and carving wood so seeing all these details here is very nice. I’m very happy to learn all you have written here. I would like to personally buy a table saw for my dad. Do you think that I can make an order for delivery?
Hi Riley!
Thanks for the compliment! I’m sure your dad would love to get a table saw from you. Who knows, you might find yourself using it for your own projects too!
You can definitely have table saws delivered to your home. Many are available on Amazon and that makes it very easy.
Have a great day!
Hello Greg, learning about the table saw has been a great deal for me and I appreciate this article a lot.
I am not really into full time carpentry, but I do make some woodwork on my own at home with my kids and it’s really fun. I have seen the electric table saw at some workshops but I didn’t have a full understanding of its parts and how it works. It is indeed a beauty to see something that can be so efficient and make work so easy.
Hi Benson,
I’m glad you found the article helpful. There are a lot of different things you can do with woodworking. It’s good that you are making things with your kids. I’m sure those woodworking projects made wonderful memories for them .
Have a great day!
Hello there! This is an amazing article and educative too!
I am a newbie when it comes to woodworking and tools but with is article I learned a lot about the table saw. Especially how you have described step-by-step about it, and how it works, and why we should use it. You have described all these things perfectly.
In this stay at home time, I will try my hands at some woodworking! Thanks for sharing.
Hi Lizzychris,
Thanks for leaving a comment! I’m glad you found my post helpful.
All the best to you as you get started woodworking!
Greg,
Awesome informative post on what is a table saw. The table saw my dad had was really dangerous. It had no safety features, but he never hurt himself and would not let me use it obviously. What about the ones that sense things like fingers and shut down instantly? Are they a big hit still? Did they ever really take off? I apologize, I can’t remember the name of them.
Hi Russ! I’m glad you liked my article. The “Sawstop” table saws are growing in popularity a lot! It’s pretty amazing just how well they do work. It does cost more money though. Each time the blade brake stops it costs about $40 to replace the brake plus a new sawblade. But that’s pretty cheap compared to the loss of a finger and a trip to the Emergency room!
Take care!
Greg
Greg that is cool, we have much in common I had no idea you were into woodworking. If you read my profile you will see I am a retired contractor.
One of the first men I ever worked for was a perfectionist. He made us use a huge table saw on every job we did, whether we needed it or not, and yeah it weighed around 300 pounds I think.
Thing is we did nothing but repeat work and he walked around going chi -ching counting the money he was making in his head. Leon Clay was his name way down in Alabama my original hometown, Tuscaloosa Roll tide haha.
Anyway, you really know your saws and loved seeing all the old ones antiques is my thing especially my tools of the trade. I really enjoyed you sharing this with me, and oh yeah didn’t even know they made one hanging with a free-swinging blade I guess you could say hard to tell. Anyway thanks, man.
Hey Gary,
I’m glad you like the article! Yeah, a lot of us have done a lot of work for men that made money making the most important thing, rather than taking care of their people. Sounds like you had a good long career though. I bet it’s satisfying to see projects you worked on still standing, and that will remain for generations to come.
The history of tools is pretty fascinating. There have been a lot of really brilliant people who have made some really creative designs.
Take care!
Greg
Very informative article about table saws. I really like how to emphasize how important it is to be safe while using it. I also like how you pointed out how you can purchase a hands-free power switch. This would come in very handy for my husband right now as he is building our back deck. I’ll bookmark this for him to read!
Miranda
Hi Miranda,
I’m so glad you found helpful information in my article. Thank you for taking time to send me a comment, I really appreciate hearing from you!
Greg
I am thinking of getting a saw for home use. To cut a variety of wood for different projects I have in mind. But I find it quite scary with these electrical saws because I have heard so many terrible stories about people hurting themselves. So safety is very important for me if I am going to buy a saw to have at home. Also I would like a saw that does not sound to loudly. I am thinking of neighbours and I find the sound really terrible on some saws. What kind of saw would you recommend for a picky newbie like me?
Hello Hilde
Thank you for reading my article! You asked an excellent question! What kind of saw I would recommend for a “picky newbie” really does depend on the type of project you’re working on. For instance, if you are making boxes or cabinets that require a lot of very fine precision straight cuts, then one of the table saws would be best. Yes they are very loud, but on the bright side you generally only use them for a few seconds at a time.
If by chance you are making projects where long precision cutting isn’t as important, then a jigsaw may be the perfect tool for you. They are much safer to use, very quiet compared to a table saw, extremely versatile, and less than $100. You can check them out in this blog article about jigsaws.
Take care!
Greg
Hi Greg, this is a very informative and comprehensive post about table saws. From the history to the workings and types of saws, you have covered it all. I was curious to know why the hands free power switch is often an additional item, rather than a standard safety feature? I always thought a table saw was just for cutting straight, but have now learnt that with the mitre gauge, it can also cut at angles.
My son is doing his carpetry apprenticeship and I am always asking him about tools and what they can do. I am sure he will be impressed if I can share some of my new knowledge with him. Well done on a super post, I’ll be sharing it.
Thanks for taking the time to leave me a note! I appreciate it! You ask a perfect question too. I really don’t know why the hands free power switch has been so slow in coming to the production line. I know woodworkers have been very creatively making their own for a very long time. It’s also extra strange to me because of the tremendous number of table saw accidents each year. (about 40,000 with 10% being amputations, eek!) Thankfully the Sawstop company has created the flesh sensing technology. It’s truly amazing!
All the best to you,
Greg